Archives August 2026

12 Easy Apartment Decorating Ideas That Require Zero Drilling

12 Easy Apartment Decorating Ideas That Require Zero Drilling

To decorate a rental apartment without drilling, use non-damaging adhesive strips for wall decor, tension rods for window and closet storage, peel-and-stick wallpaper for aesthetic updates, and vertical shelving units that rely on gravity rather than wall mounts. These methods protect your security deposit while allowing full creative expression.

The Power of Peel and Stick Decor
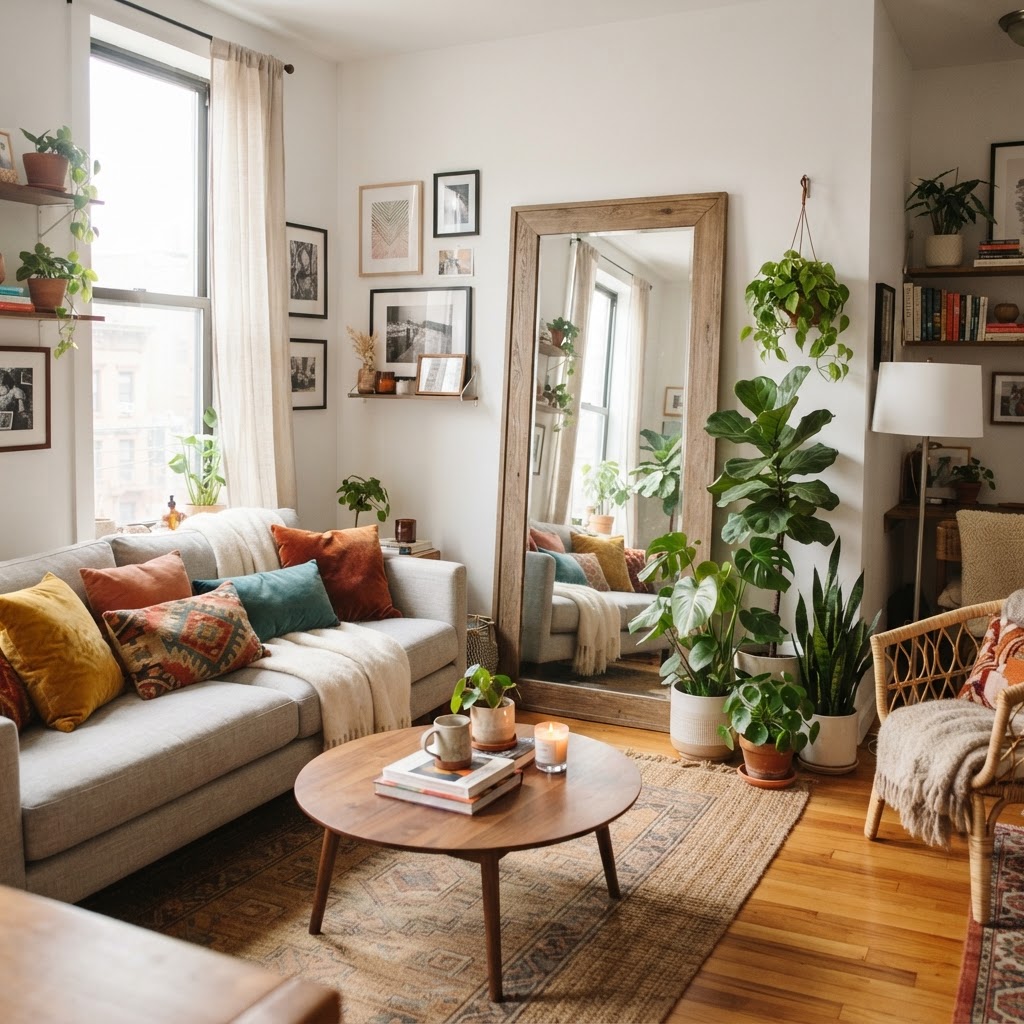
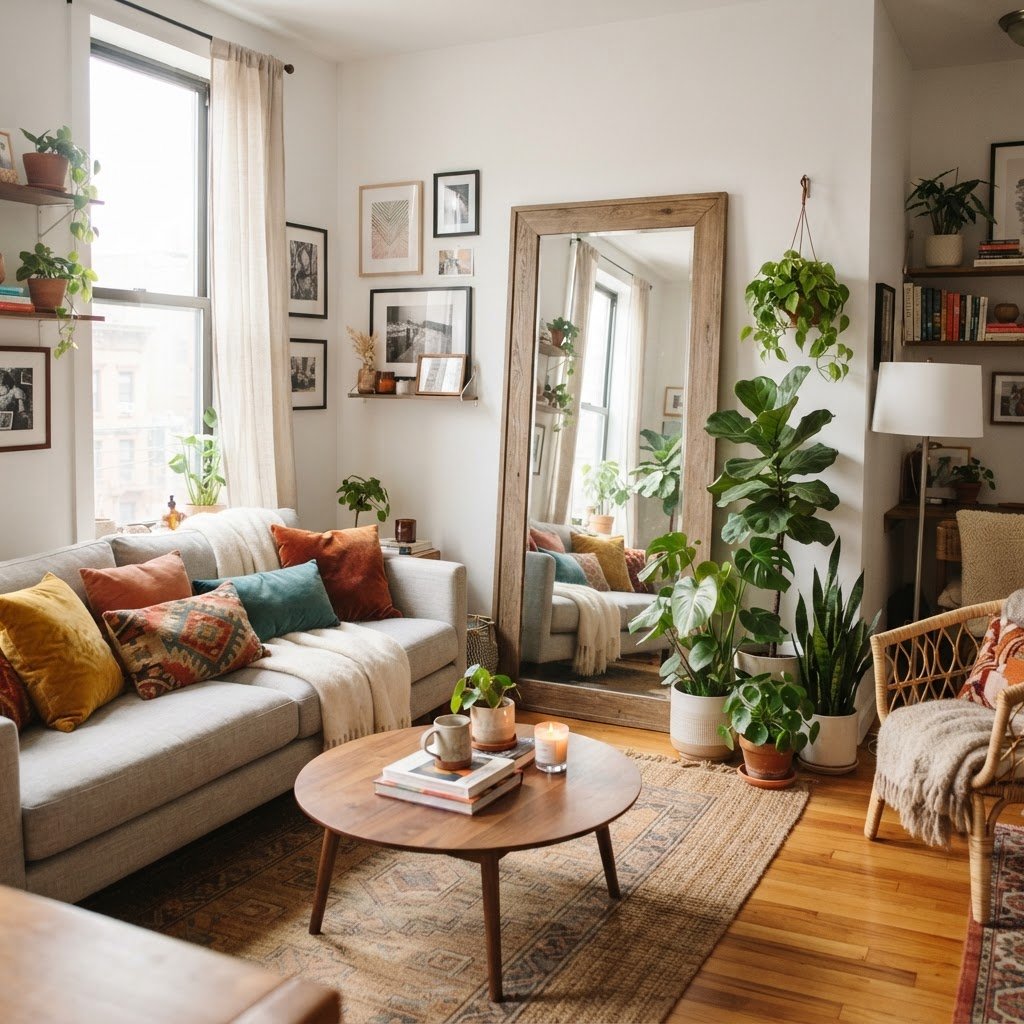
A leaning floor mirror instantly adds depth and elegance to any rental living room.

Peel and stick technology has revolutionized the rental market, offering a high-impact, temporary way to customize dated surfaces without professional tools or permanent adhesive damage. By utilizing high-quality vinyl wallpaper and tile decals, you can cover up to 50 square feet of wall space in under three hours with only a utility knife and a plastic squeegee. Unlike traditional wallpaper that requires paste and soaking, these self-adhesive options are designed to pull away cleanly from drywall or painted surfaces when your lease concludes.

Transforming Surfaces with Wallpaper

Removable wallpaper is arguably the most impactful way to update a room without drilling. You can choose bold patterns to create a statement wall or subtle textures to add depth to your living area. Since it requires only a squeegee and a utility knife, it is the perfect DIY project for beginners. Ensure your walls are clean and dry before application to maximize the longevity of the adhesive, and always order a small sample first to test how it adheres to your specific wall texture. When shopping, look for products rated for “removability” for up to 3 years to ensure they come off without taking the wall’s paint layer with them.

Feature Peel and Stick Wallpaper Traditional Wallpaper
Installation Peel and stick Paste and brush
Removal Damage-free Requires steamer/stripper
Cost $30–$80 per roll $50–$200+ per roll
Skill Level Beginner Professional/Advanced

Utilizing Heavy-Duty Adhesive Strips

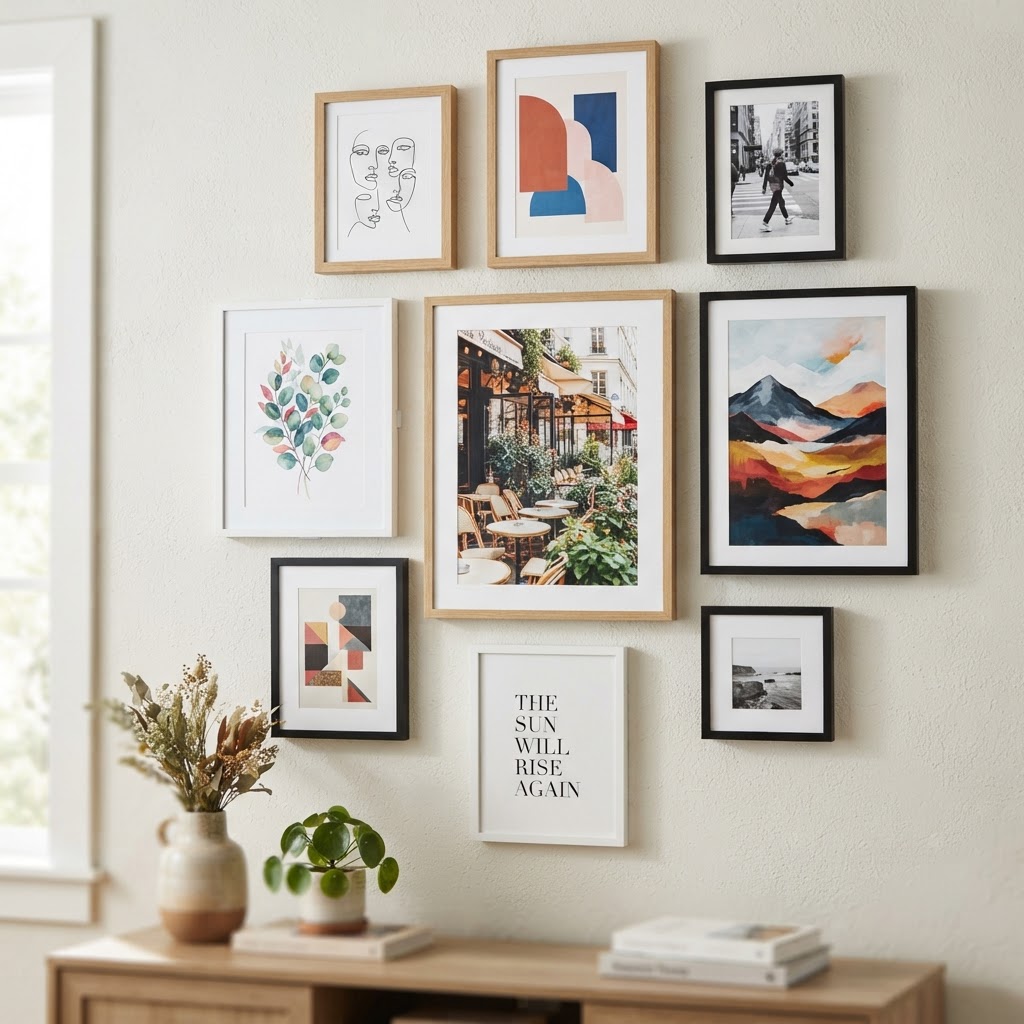
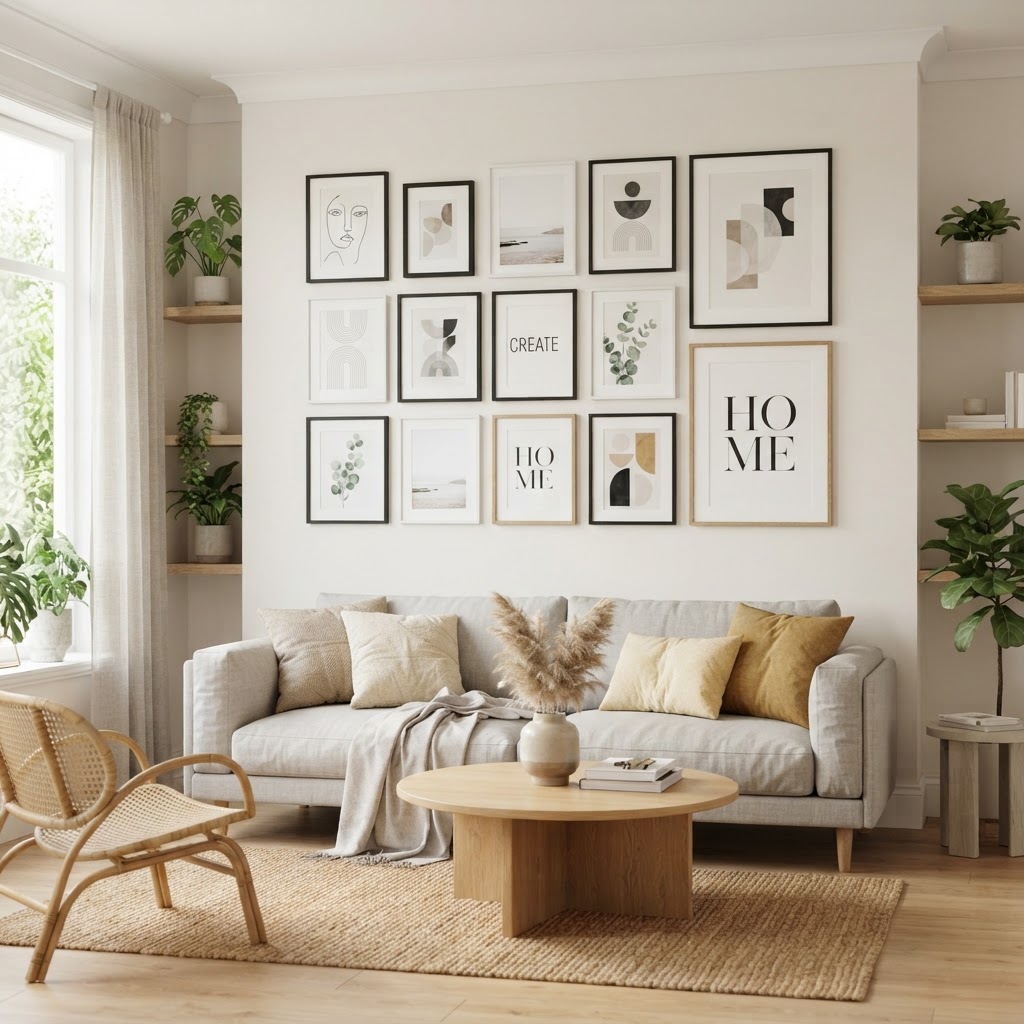
Create a custom gallery wall using damage-free adhesive strips for a permanent-look display.

High-performance adhesive strips allow you to mount heavy decor weighing up to 16 pounds without using a single nail or screw. Modern adhesive mounting technology uses pressure-sensitive foam and specialized interlocking tabs to support frames, canvas art, and even mirrors. To ensure success, always clean the wall surface with isopropyl alcohol before application, as even invisible dust or skin oils can compromise the bond. If you are hanging a frame over 5 pounds, use at least four strips, one at each corner, to distribute the load evenly and prevent the item from drooping or peeling off the paint.

Creating a Gallery Wall

One of the most popular apartment decorating ideas is the gallery wall, but it is usually associated with a dozen nail holes. By using adhesive mounting strips, you can arrange your favorite prints and photographs in a dynamic grid or a free-form organic shape. Start by laying your frames out on the floor to perfect your layout before moving to the wall. This minimizes the risk of having to move the adhesive once it is placed. Pro tip: use a laser level to ensure your adhesive-backed frames remain perfectly aligned across a 6-foot stretch of wall, which gives the installation a professional look that guests will assume was drilled.

Clever Use of Vertical Furniture
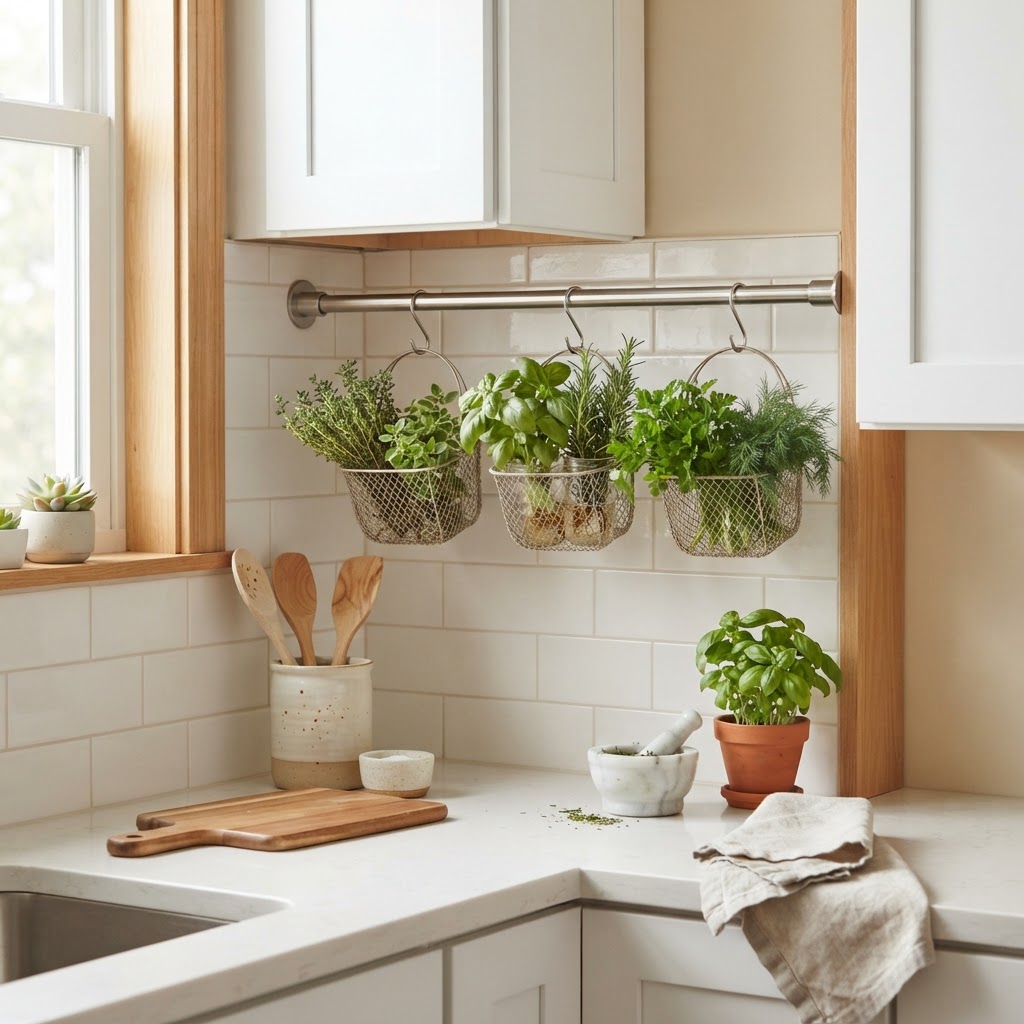
Tension rods are a renter's best friend for adding hidden storage in kitchens and bathrooms.

Vertical furniture, such as leaning bookcases and room dividers, utilizes gravity to maximize floor space without requiring any mechanical connection to the walls. These pieces are ideal for apartments where drilling into metal studs or concrete is prohibited by lease agreements. A standard 6-foot tall ladder shelf can provide over 15 linear feet of storage for decor and essentials, effectively creating “storage walls” that act as focal points. By choosing pieces with a narrow footprint, you can zone an open-concept studio into distinct living, working, and sleeping areas simply by positioning furniture strategically.

Strategic Use of Mirrors and Lighting

Mirrors and lighting are the most effective way to manipulate the perception of space in a rental apartment, doubling the visual volume of a room without any physical renovation. Placing a large, floor-standing mirror—typically 60 to 72 inches tall—against a main wall reflects natural light and makes a 200-square-foot room feel significantly larger. Pair this with a combination of floor lamps and battery-operated puck lights to illuminate dark corners. By placing a warm-toned lamp behind your furniture, you create an ambient glow that masks the “rental box” feel of neutral walls, providing a high-end look without needing to install light fixtures or ceiling fans.

Incorporating Textile-Based Decor

Soft furnishings like tapestries, area rugs, and floor-to-ceiling curtains provide an immediate way to introduce color and texture while improving the acoustic quality of thin-walled apartments. For large-scale wall art, use heavy-duty command-style clips or magnetic poster hangers that attach to the molding rather than the wall. Curtains are particularly powerful; hanging a floor-to-ceiling rod, anchored by tension rather than screws, creates a custom designer aesthetic. Research shows that layering textiles can reduce noise echoes by up to 25%, making your rental feel more private and cozy. Using 100% linen or velvet curtains adds a weight and presence that elevates the entire room’s design profile.

Utilizing Tension Rods for More Than Curtains

Most people think of tension rods only for shower curtains or window treatments, but their utility goes much further. You can use them inside bookcases to add a decorative fabric backing or even under kitchen cabinets to create an organizer for spray bottles. Tension rods operate by pressure rather than screws, making them one of the most versatile non-damaging tools for any renter. You can even use them to create a room divider by hanging lightweight sheer curtains from ceiling to floor if you place the rod securely between two walls. For maximum stability, ensure the surface area at both ends of the rod is clean, as the rubber end-caps require friction to hold weights up to 10 pounds.

Floating Shelves and Command Storage

Specialized adhesive floating shelves allow you to display lightweight decor like succulents, candles, or small frames by utilizing proprietary high-bond acrylic tape. While these are not meant for books, they are perfect for decor accents that add personality to a room. For heavier storage, look for over-the-door organizers that use the existing door frame as a support structure. These organizers can hold up to 20 pounds of pantry items, cleaning supplies, or shoes without requiring any hardware. Utilizing the “dead space” behind doors is the fastest way to gain 5 to 10 square feet of usable storage in a studio apartment without touching the walls.

Bringing Nature Indoors with Plants

Plants are perhaps the most organic way to decorate an apartment. Instead of hanging baskets that require ceiling hooks, focus on floor-based plants. Use decorative planters or plant stands of varying heights to create a “mini-forest” in the corner of your living room. A tall Fiddle Leaf Fig or a cascading Monstera can become a piece of living art. Not only does this solve your wall-decorating dilemma, but it also improves indoor air quality, making your apartment feel fresher and more inviting. To keep your floors protected, use a waterproof tray beneath any pot larger than 10 inches to prevent moisture damage from leaks or over-watering.

How to Choose the Right Decor for Your Space

Choosing the right decor is about understanding your lease agreement and the physical limitations of your walls. Always double-check your lease; some landlords are stricter than others. If you live in an older building with plaster walls, be extra careful with adhesives, as the paint might be more prone to peeling than in newer drywall units. Always perform a patch test on a small, inconspicuous area behind a door or inside a closet to ensure your chosen adhesives won’t damage the paint finish. For older units, prioritize free-standing furniture over adhesives to ensure 100% risk reduction for your security deposit.

Budget-Friendly Strategies

Decorating doesn’t need to be expensive. Many of these projects, such as using command hooks or tension rods, are very affordable. Check out thrift stores for unique picture frames, vintage mirrors, or decorative storage bins. When you combine second-hand finds with clever mounting hacks, you create a home that is truly unique and personal, all while respecting your budget and your rental agreement. Investing $50 to $100 in high-quality adhesive products and thrifted decor can completely change the vibe of a living space for less than the cost of a single professional painting job.

FAQ

Q: Can adhesive strips really hold heavy mirrors?

Yes, heavy-duty adhesive strips designed for large mirrors can hold up to 16 pounds if used correctly. You must verify the weight of your mirror, use the manufacturer-recommended number of strips, and ensure the wall surface is cleaned with rubbing alcohol before application for a secure bond.

Q: Does peel-and-stick wallpaper damage rental walls?

When applied to correctly painted drywall, high-quality peel-and-stick wallpaper will not damage walls upon removal. Always perform a small patch test in an inconspicuous area for 48 hours to ensure the adhesive does not lift the existing paint layer when you pull it off.

Q: What is the best way to hide holes left by previous tenants?

To hide existing holes without drilling, you can use high-quality spackle and touch-up paint that matches your apartment’s current wall color. Alternatively, use peel-and-stick wall art or strategically placed mirrors to cover the blemishes until your lease is up.

Q: Are tension rods strong enough for room dividers?

Yes, high-tension spring-loaded rods can support lightweight curtains or room dividers when extended between two stable walls. For best results, use a heavy-duty tension rod with non-slip rubber end caps to prevent the rod from slipping under the weight of the fabric.

Q: What is the best way to maximize space in a studio apartment?

Focus on verticality by using tall, free-standing bookshelves and over-the-door organizers to store items off the floor. Zoning the room with large area rugs and placing furniture away from the walls can also make a studio feel like a larger, multi-functional home.
Cozy Living Room Makeover: Master Warm Ambient Lighting

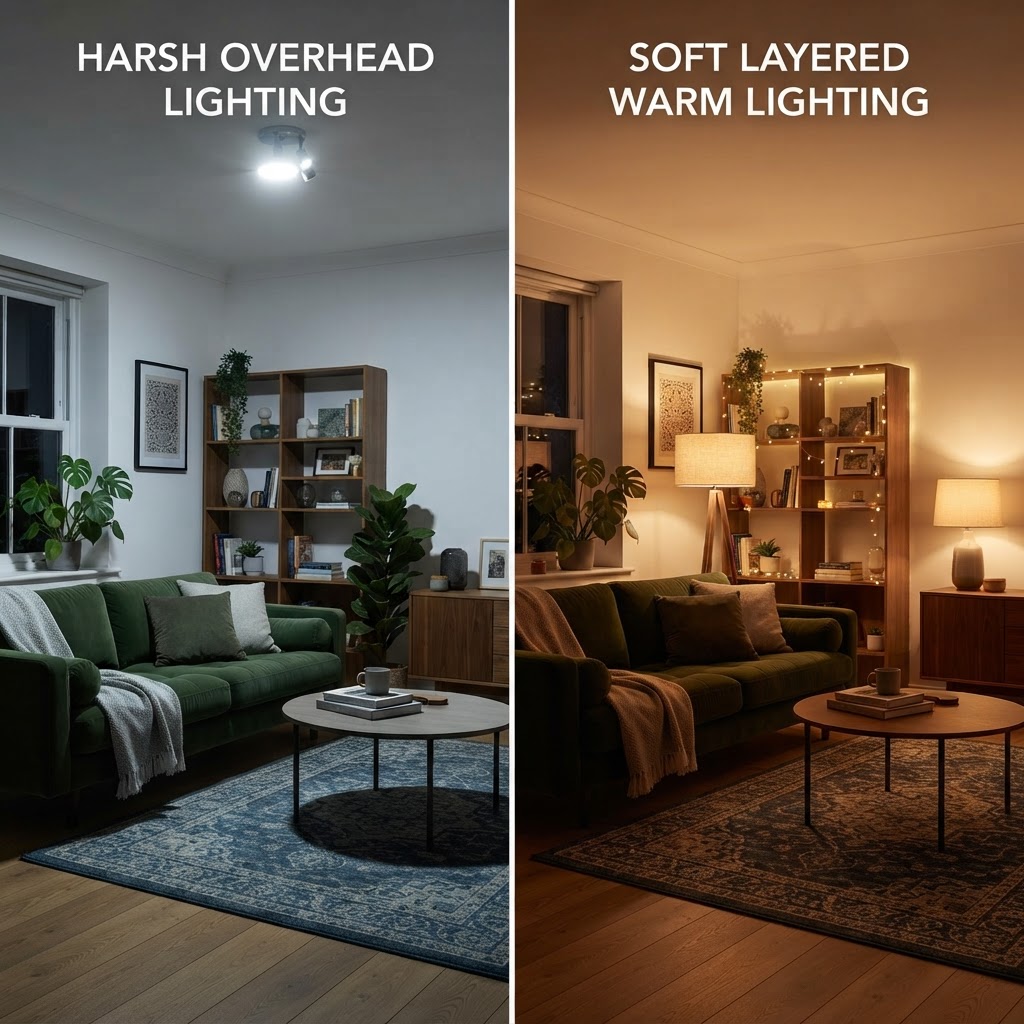
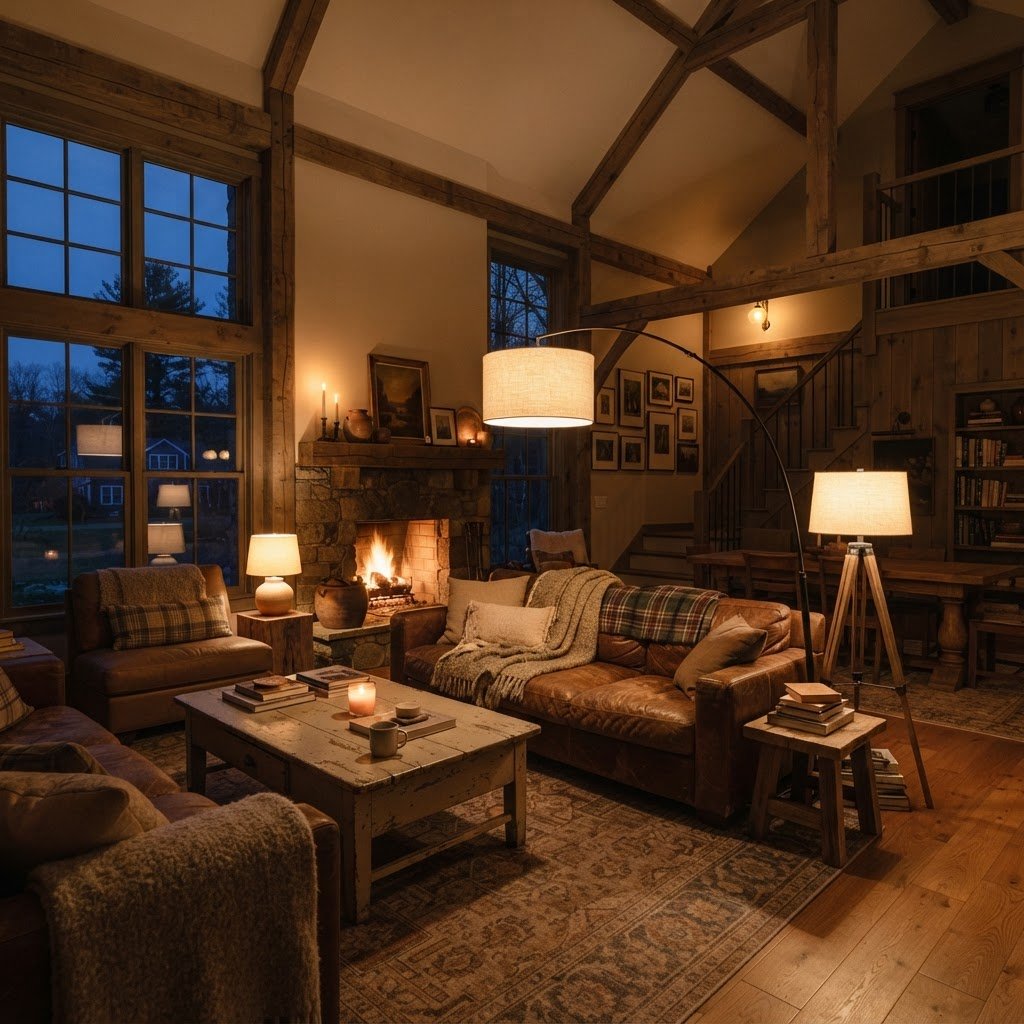
A cozy living room makeover using only warm ambient lights is achieved by selecting bulbs between 2200K and 2700K, layering diverse light sources at eye level, and utilizing dimmers to eliminate harsh overhead glare. This approach transforms any space into a tranquil retreat by mimicking the soothing, low-temperature spectrum of natural firelight.

The Psychology of Warm Ambient Lighting

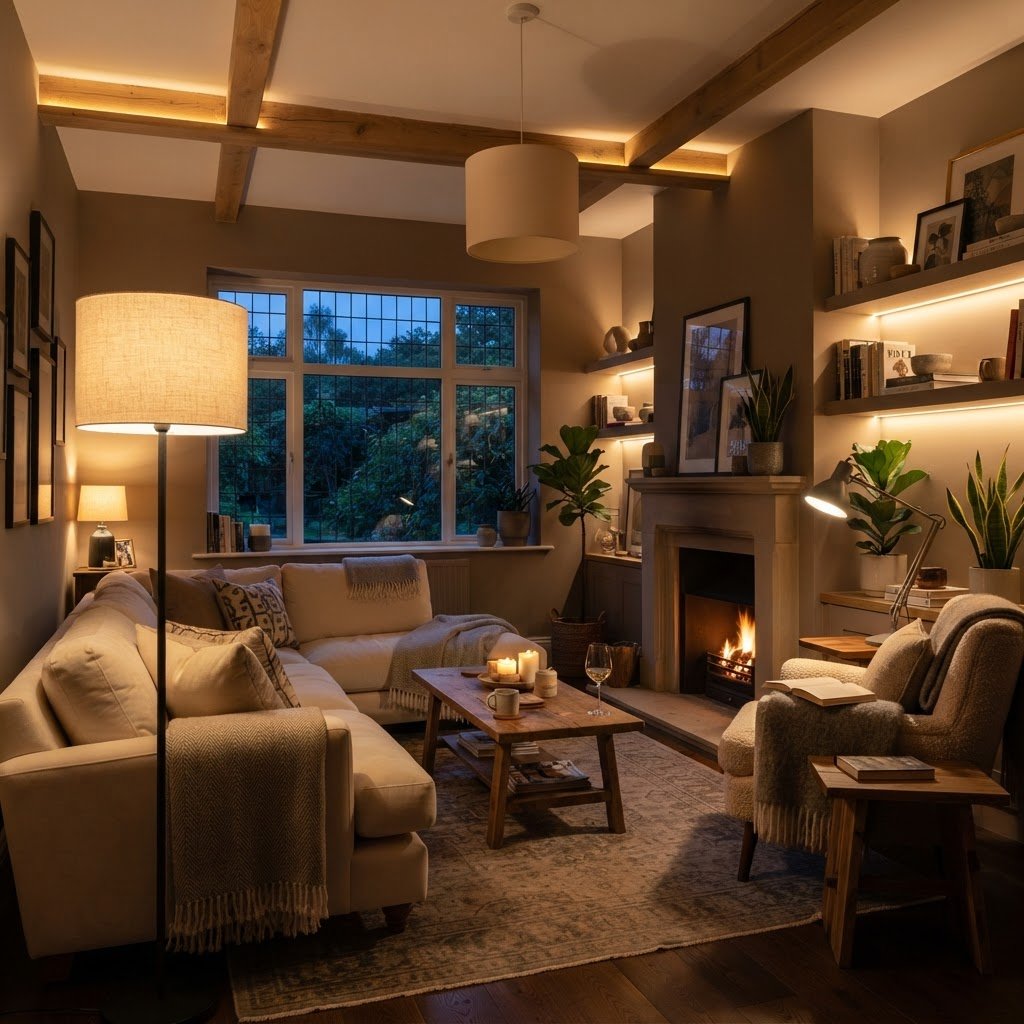
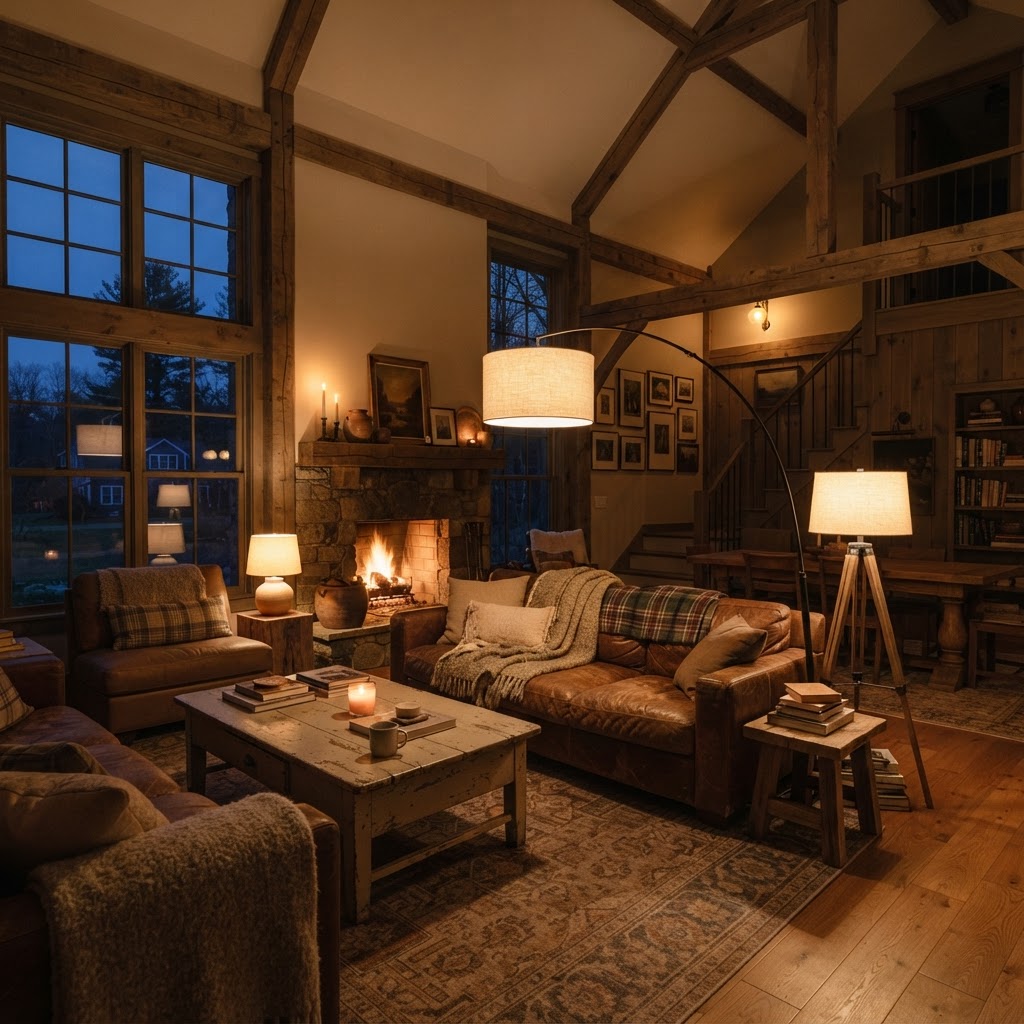
A perfectly lit living room using warm ambient lighting to create a tranquil evening retreat.

Human circadian rhythms are deeply influenced by the color temperature of light, with warm hues signaling safety and rest to the nervous system. While blue-spectrum light (above 4000K) suppresses melatonin and induces alertness, warm ambient light (2200K–2700K) promotes the production of calming hormones. When you replace standard cool-toned bulbs, which often reach 5000K, you immediately reduce visual agitation and lower the room’s perceived physical temperature. Research suggests that keeping evening light exposure under 3000K improves sleep onset latency by approximately 20% compared to exposure to harsh, high-kelvin overhead fixtures. By manipulating the Kelvin scale, you effectively tell your brain that the day is over, creating a biological trigger for relaxation. This is the physiological foundation of a cozy room; it is not merely an aesthetic choice but a necessary environmental adjustment to mitigate the stress of modern, high-contrast lighting environments that dominate most homes.

Feature Cool/Daylight (4000K+) Warm Ambient (2200K-2700K)
Primary Effect Stimulating/Alert Calming/Relaxing
Best Use Kitchen/Office Tasks Living Room/Bedroom
Biological Impact Melatonin Suppression Melatonin Production
Aesthetic Feel Clinical/Sterile Inviting/Cozy

Understanding the Basics of Layered Lighting

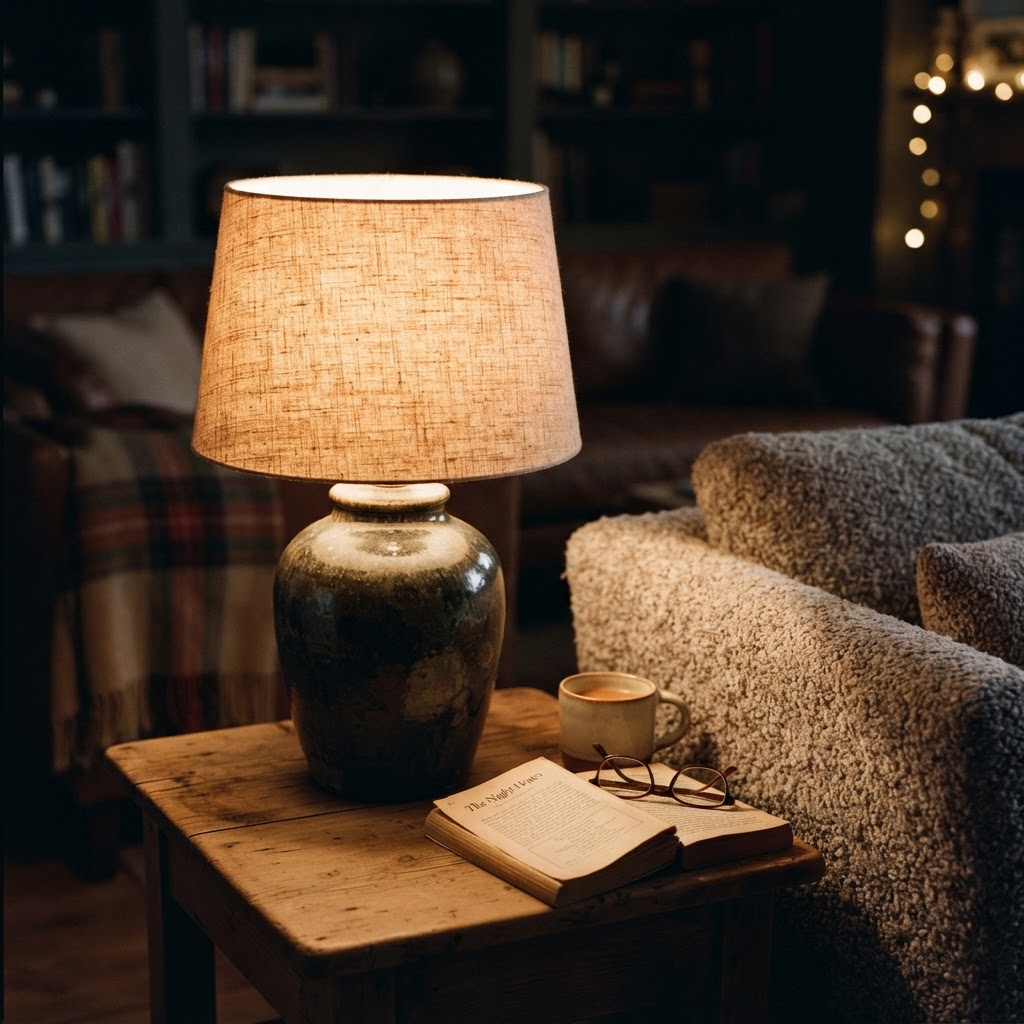
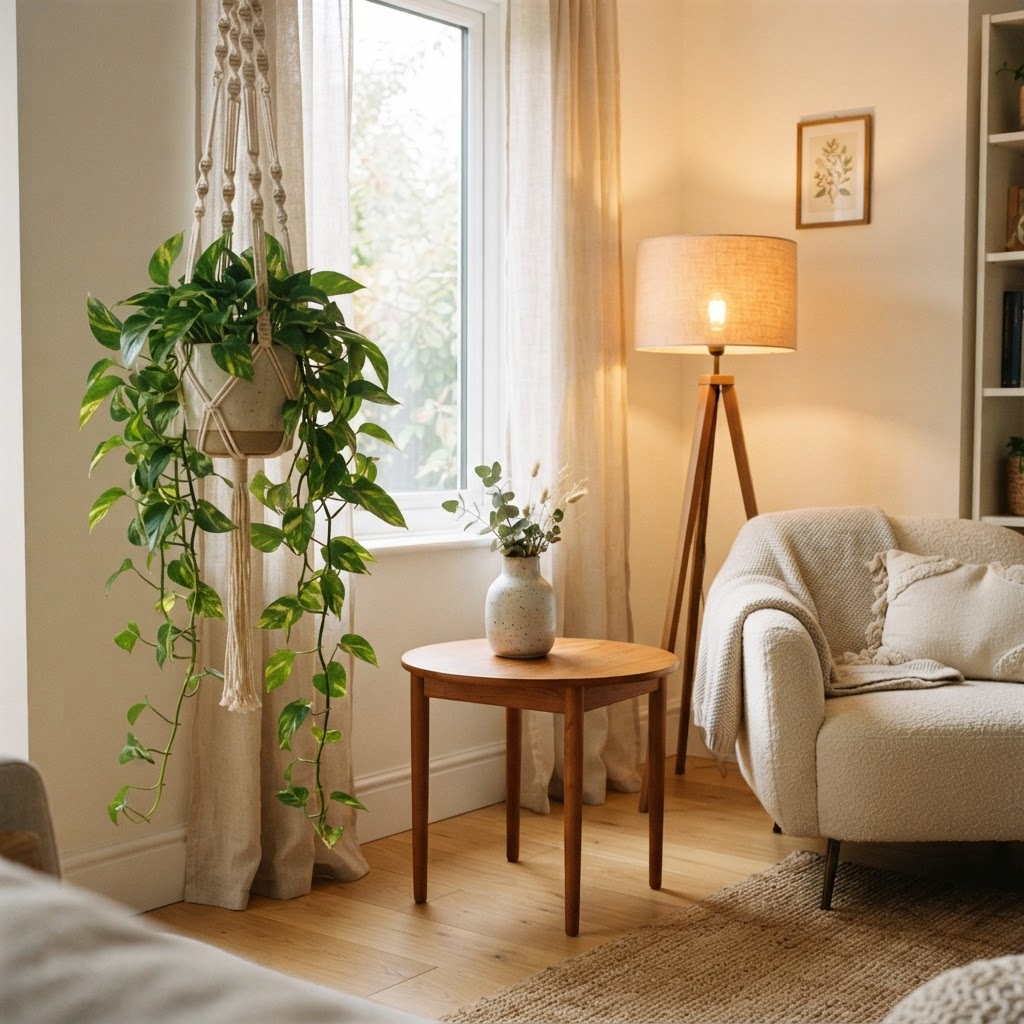
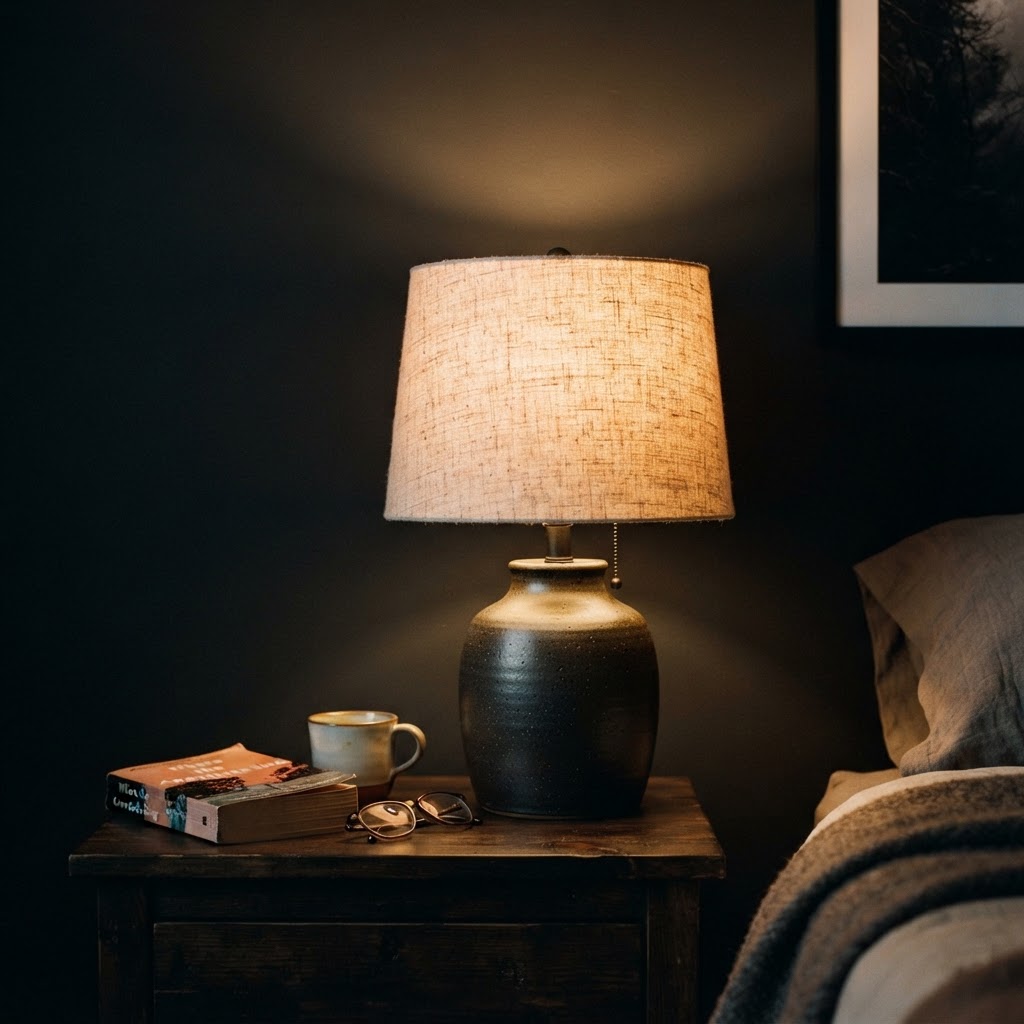
The power of a high-quality linen lampshade in diffusing warm light for a soft, inviting atmosphere.

Professional interior design relies on layering light to create depth, where ambient, task, and accent lighting work in concert to eliminate shadows. A singular ceiling fixture creates flat, uninspiring illumination that highlights flaws and creates harsh, sharp transitions. To master ambient lighting, you must distribute light across multiple levels—eye level, surface level, and floor level. By placing sources at different heights, you create a three-dimensional wash of light that softens room edges and makes the space feel larger yet more intimate. A common mistake is relying on a single central light; instead, use at least three distinct light sources per room to create a balanced “glow.” When selecting bulbs, avoid anything labeled “Daylight” or “Cool White,” as these contain significant blue light spikes. Stick strictly to “Warm White” or “Soft White” labels. These bulbs render wood tones and textiles with a richer saturation, making furniture appear more expensive and surfaces feel softer to the touch. This method of layering is the single most effective way to elevate a standard living room into a sophisticated, comfortable sanctuary.

Why Ambient Lighting Matters

Ambient light acts as the primary layer of general illumination, defining the overall character and mood of your interior space.

Choosing the Right Color Temperature

For a truly cozy feel, avoid anything labeled “Daylight” or “Cool White.” Stick strictly to “Warm White” or “Soft White” labels. These bulbs provide that golden glow that makes wood furniture appear richer, textures look softer, and skin tones look more radiant.

Essential Fixtures for Your Transformation

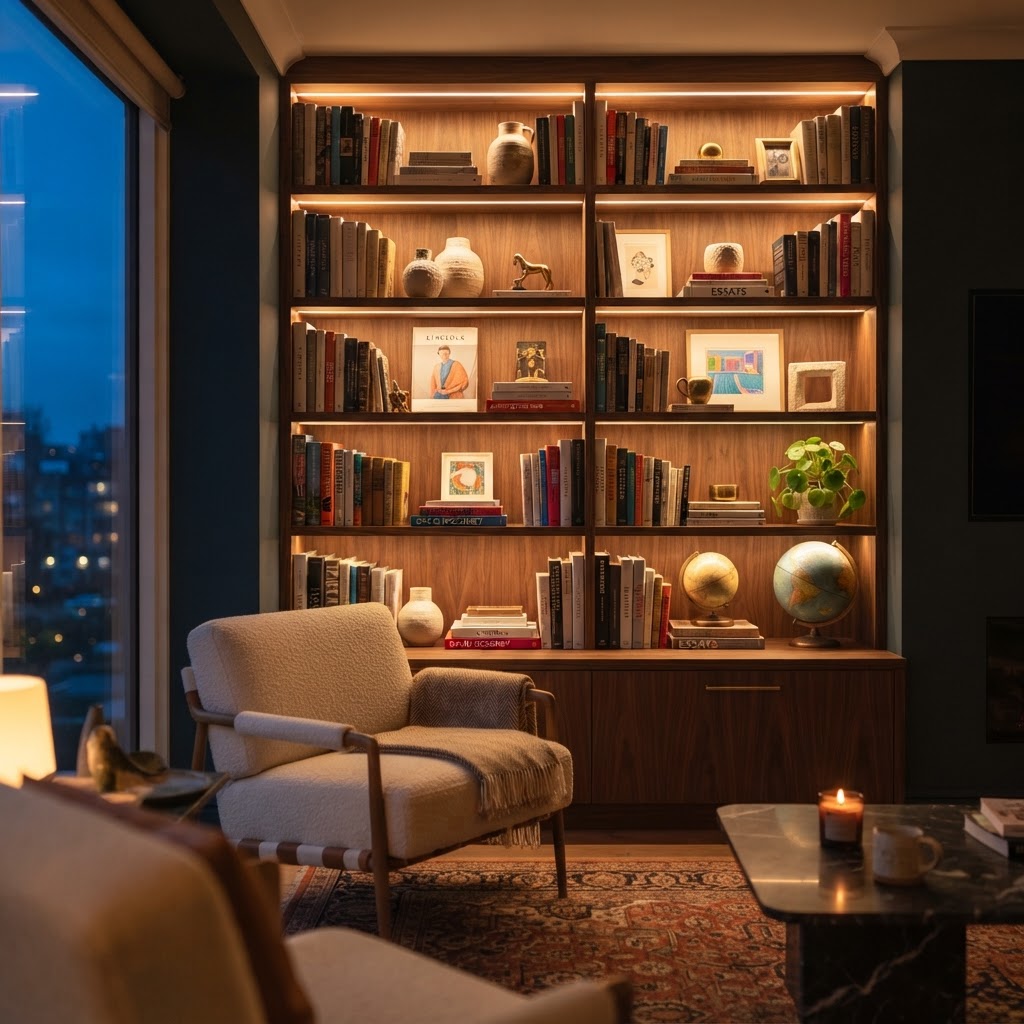
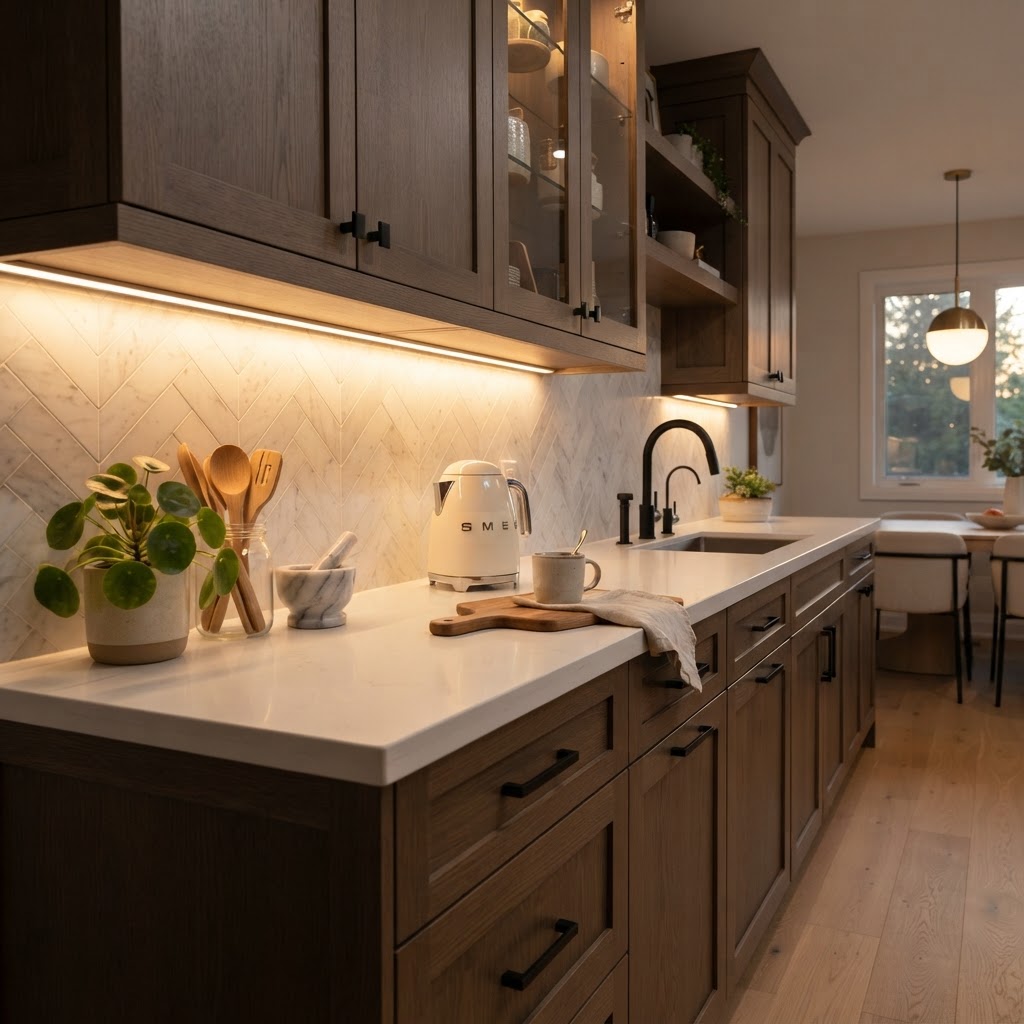
Hidden LED strips provide subtle, indirect ambient light that adds depth and sophistication to shelves.

Curating a diverse collection of lighting fixtures is essential to achieving a professional, layered look that covers all corners of the living room. You should aim for a combination of four specific fixture types to create a functional yet aesthetic distribution of light throughout the space. Floor lamps, ideally placed in corners or next to reading chairs, provide a necessary vertical wash of light that illuminates height and volume. Table lamps are perfect for adding depth to consoles and side tables, effectively creating localized “pools” of light. Wall sconces serve a dual purpose by adding architectural interest while keeping floor space entirely clear for better movement. Finally, hidden LED strips (best set at 2400K) placed behind televisions or under shelving units add a modern, “floating” effect that increases the perception of depth in small rooms. By mixing these four types, you prevent the clinical appearance of a single overhead fixture and instead create a tailored, cozy environment. Prioritize dimmable versions of these fixtures to allow for maximum flexibility during various times of the day or social activities.

Placing Your Lights for Maximum Comfort

Strategic lighting placement relies on the principle of triangulation to create soft, uniform coverage without the fatigue caused by sharp glare. By placing your lighting sources in a triangular pattern across the room, you ensure that light is evenly distributed, effectively eliminating dark, cavernous corners that make a room feel smaller. For the best result, place your primary seating area at the center of this triangle. This setup ensures that your eyes do not experience sharp contrast transitions when looking around the room. Furthermore, always prioritize diffusion to improve comfort; lampshades crafted from linen, heavy paper, or thick woven fabrics act as natural filters that disperse light in multiple directions, creating a glow rather than a beam. If a specific lamp remains too bright even with a shade, it is likely the bulb has too high a lumen count; keep ambient lamps between 450 and 800 lumens for the perfect balance of cozy output. This deliberate placement and diffusion strategy transforms a cluttered room into a curated retreat, ensuring the eyes remain relaxed regardless of where you are seated.

The Rule of Triangulation

Place your lighting sources in a triangular pattern across the room. If you have a primary seating area, ensure that you have lamps at different heights around that zone. This prevents dark corners and ensures that the eyes are not strained while moving from one part of the room to another.

Diffusing the Glow

Never underestimate the power of a lampshade. Shades made of linen, paper, or woven materials act as natural diffusers, softening the output of your warm ambient lights even further. If a lamp feels too bright, simply swapping the shade for a thicker material can solve the issue instantly.

Elevating the Vibe with Dimmer Switches

Installing dimmer switches allows you to convert static, one-dimensional lighting into a dynamic, mood-responsive system that adapts to your changing needs. Static lighting is limiting because it cannot account for the difference between a task-heavy afternoon and a relaxed evening; conversely, dimmable lights offer complete control over your home’s atmosphere. At full 100% capacity, warm ambient lights provide enough illumination for cleaning or reading, but by sliding the dimmer down to 20%–30%, you mimic the low-intensity flickering of candlelight. This versatility makes your living space feel custom-tailored to any hour of the day. Modern digital dimmers are relatively inexpensive, often costing under $30 per switch, and can be installed in under 20 minutes with basic tools. Investing in this technology is the highest-value upgrade for any cozy makeover because it extends the longevity of your bulbs while providing the exact visual environment you need to unwind. By choosing high-quality LED-compatible dimmers, you prevent the annoying buzzing or flickering often associated with cheaper, legacy hardware.

Incorporating Smart Lighting Technology

Smart lighting technology provides effortless control over your environment, allowing you to manage intensity and presets via voice or smartphone apps. With smart bulbs, you can create automated “Scenes” that trigger specific brightness levels across all lamps in a room with a single command. For example, a “Cozy Evening” scene can automatically set all bulbs to 40% intensity and 2200K, creating a uniform, relaxing atmosphere the moment you step through the door. This removes the friction of having to walk through a dark room to manually click multiple switches, effectively encouraging you to use your layered lighting plan rather than relying on one bright overhead light. Integration with systems like Alexa or Google Home allows for voice-activated adjustments, which is incredibly useful when you are already settled on the couch. While smart bulbs are more expensive than traditional LED bulbs, costing roughly $15–$25 each, the convenience and energy savings gained through automated scheduling and dimming make them a cost-effective long-term investment for any modern home.
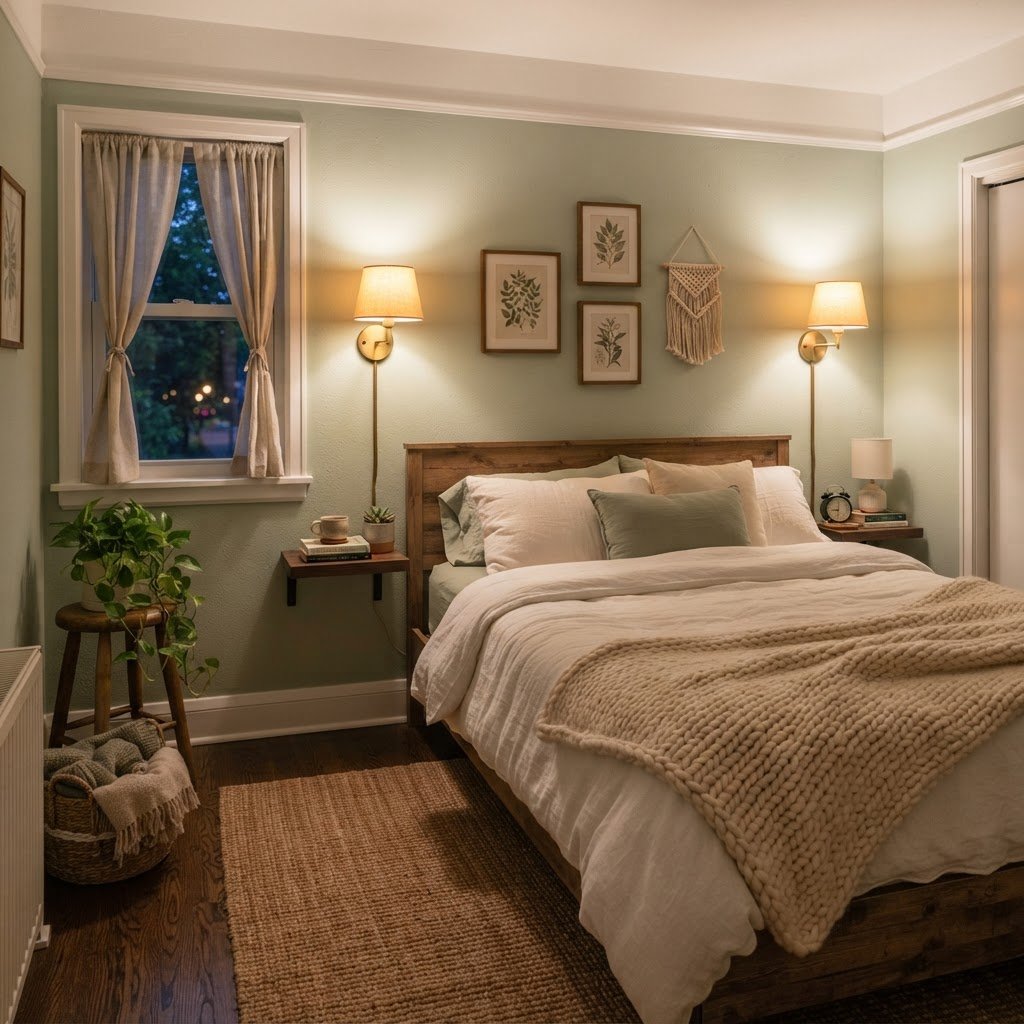
Creating Automated Scenes

With smart bulbs, you can create a “Cozy Evening” scene. With one tap, all your lamps can adjust to 40% intensity simultaneously. This level of convenience encourages you to actually use your lighting setup rather than leaving everything off or set to a harsh default.

Troubleshooting Common Lighting Mistakes

Identifying and correcting common lighting pitfalls will ensure your living room maintains a high-end, cohesive appearance that invites relaxation. One of the most frequent errors is creating glare, which occurs when a bare, high-intensity bulb is visible; always use frosted bulbs or thick shades to hide the source. Another critical mistake is mixing color temperatures, such as placing a 5000K “Daylight” bulb in a floor lamp next to 2700K “Warm” table lamps. This contrast makes a space look disjointed and chaotic, ruining the cohesive feel of your design. Furthermore, avoid the trap of flat, two-dimensional lighting where all fixtures reside on the same horizontal plane; always use a mix of tall floor lamps and shorter table lamps to create visual depth. Finally, do not feel pressured to eliminate every shadow in the room. Strategic shadows are actually essential for creating depth and sophistication. If you find a corner looks too dark, add a small, low-wattage accent light rather than a powerful, harsh overhead fixture. By adhering to these simple corrections, you will avoid the most common amateur design blunders.

FAQ

Q: What is the ideal color temperature for a cozy living room?

The ideal color temperature for a cozy living room is between 2200K and 2700K. This range provides a golden, warm glow that mimics the biological comfort of firelight, which helps the body relax compared to cooler, blue-toned lights.

Q: How many light sources should I have in my living room?

You should have at least three distinct light sources in your living room to properly layer your lighting. This allows you to eliminate harsh shadows and create a comfortable, multi-dimensional atmosphere that feels far more intimate than a single ceiling light.

Q: Can I mix different color temperatures in the same room?

No, you should never mix different color temperatures in the same room because it creates a disjointed and visually chaotic environment. Stick to a single color temperature across all lamps to ensure a cohesive, high-end design look.

Q: Are dimmer switches necessary for cozy lighting?

Yes, dimmer switches are essential because they allow you to customize the intensity of your lights for different activities. Dimmers give you the ability to transition from bright illumination for daily tasks to a soft, 30% intensity for evening relaxation or movie watching.

Q: How can I hide the glare from bright light bulbs?

You can hide glare by using frosted bulbs instead of clear ones or by choosing lampshades made from dense, opaque materials like heavy linen. These diffusers spread the light out, turning a harsh point of light into a soft, glowing glow.

Modern Minimalist Small Bedroom Ideas: Warm & Cozy Tips

Modern minimalist small bedroom design relies on maximizing floor space, utilizing warm neutral color palettes, and layering organic textures to create an inviting sanctuary. By prioritizing multifunctional furniture and intentional, high-quality decor, you can transform limited square footage into a peaceful, airy retreat that promotes restful sleep and personal comfort.

The Philosophy of Warm Minimalism

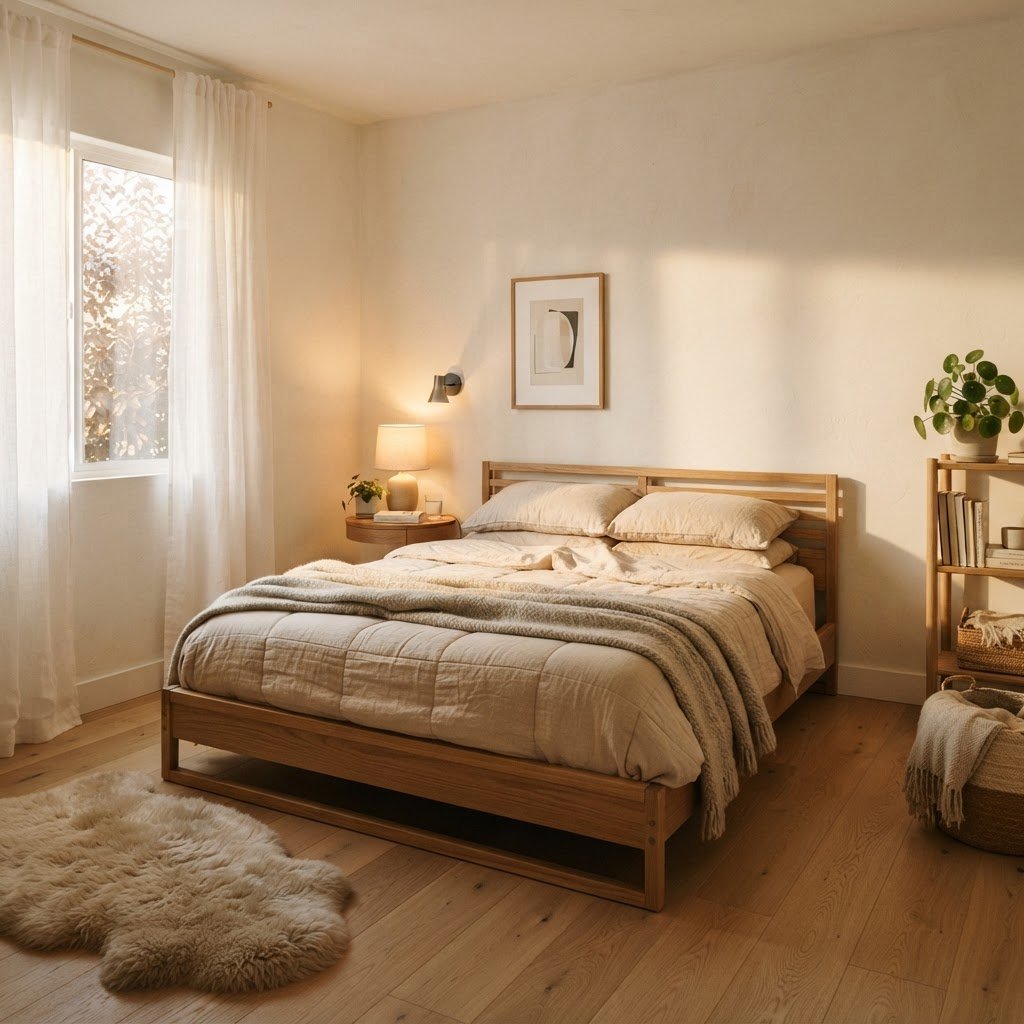
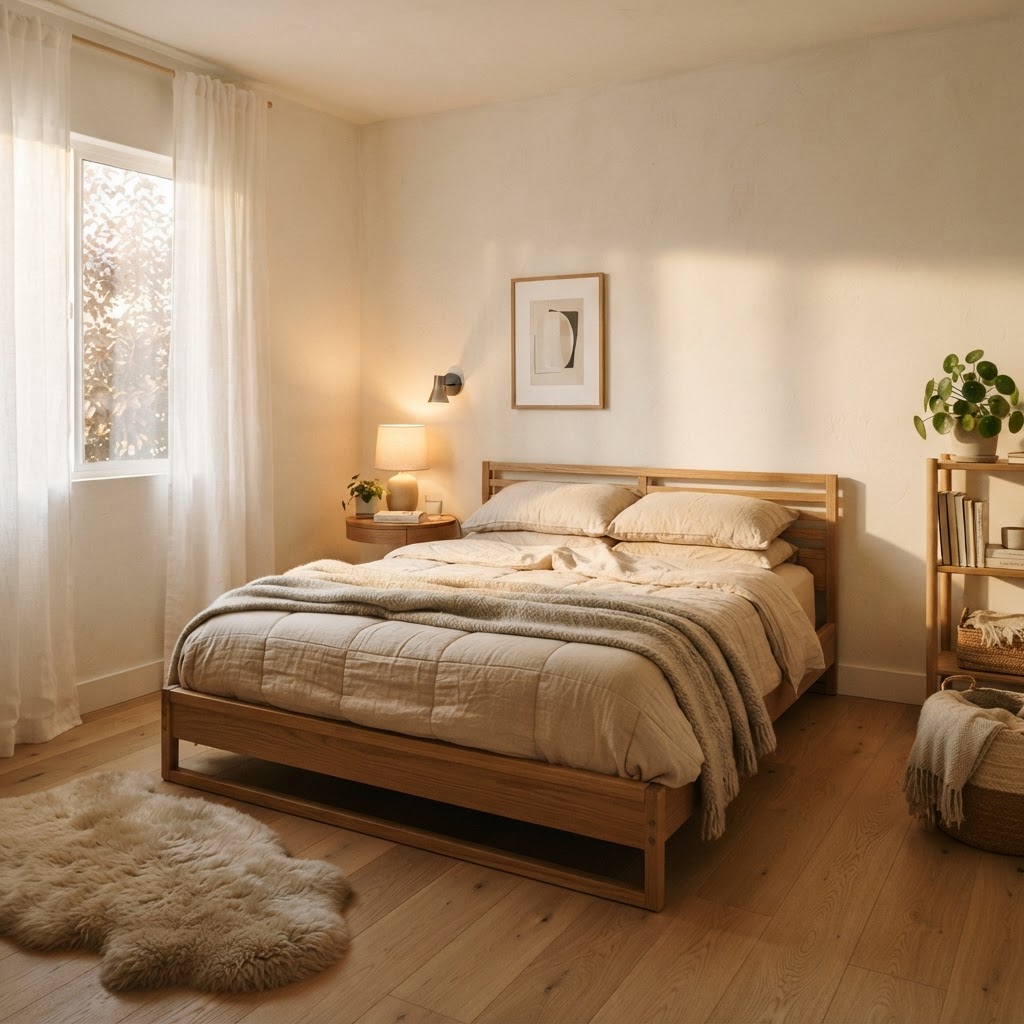
Layering textures like linen and sheepskin adds warmth to a minimalist bedroom.

Warm minimalism rejects the clinical, stark aesthetics of traditional minimalism by balancing clean lines with rich, tactile materials that evoke comfort. To achieve this, design your bedroom around organic materials like wool, cashmere, linen, and solid wood, which provide natural grounding and prevent the room from feeling like an icebox. This philosophy centers on the intentional curation of space, ensuring that every element—from the weave of a rug to the finish of a nightstand—serves a dual purpose of both aesthetic beauty and physical comfort. By stripping away non-essential clutter, you allow high-quality textures to define the room’s atmosphere.

Element Cold Minimalism Warm Minimalism
Palette Stark white, grey Cream, taupe, terracotta
Material Metal, glass, plastic Wood, wool, linen
Lighting Bright blue-tinted Soft, golden 2700K

Why Texture Matters in Small Spaces

In a room with limited color and minimal furniture, your eyes naturally gravitate toward the surfaces of objects. If everything in your room is smooth and matte, the space may feel flat. Introduce depth by layering textures. A chunky knit throw over a crisp linen duvet, or a sheepskin rug beside a polished wood nightstand, adds visual complexity without clutter. This tactile approach turns a sparse room into a cozy haven, proving that you do not need more stuff to feel more comfort.

Optimizing Furniture for Limited Square Footage

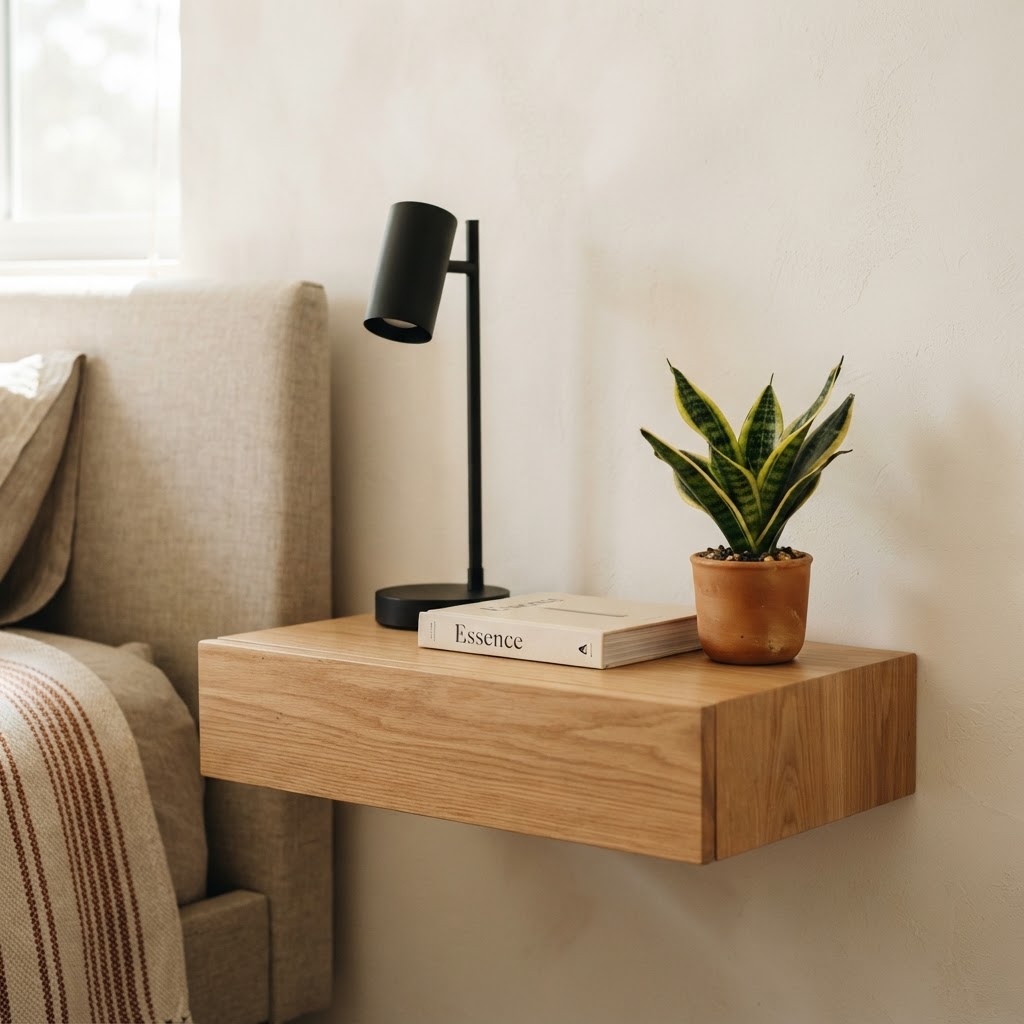
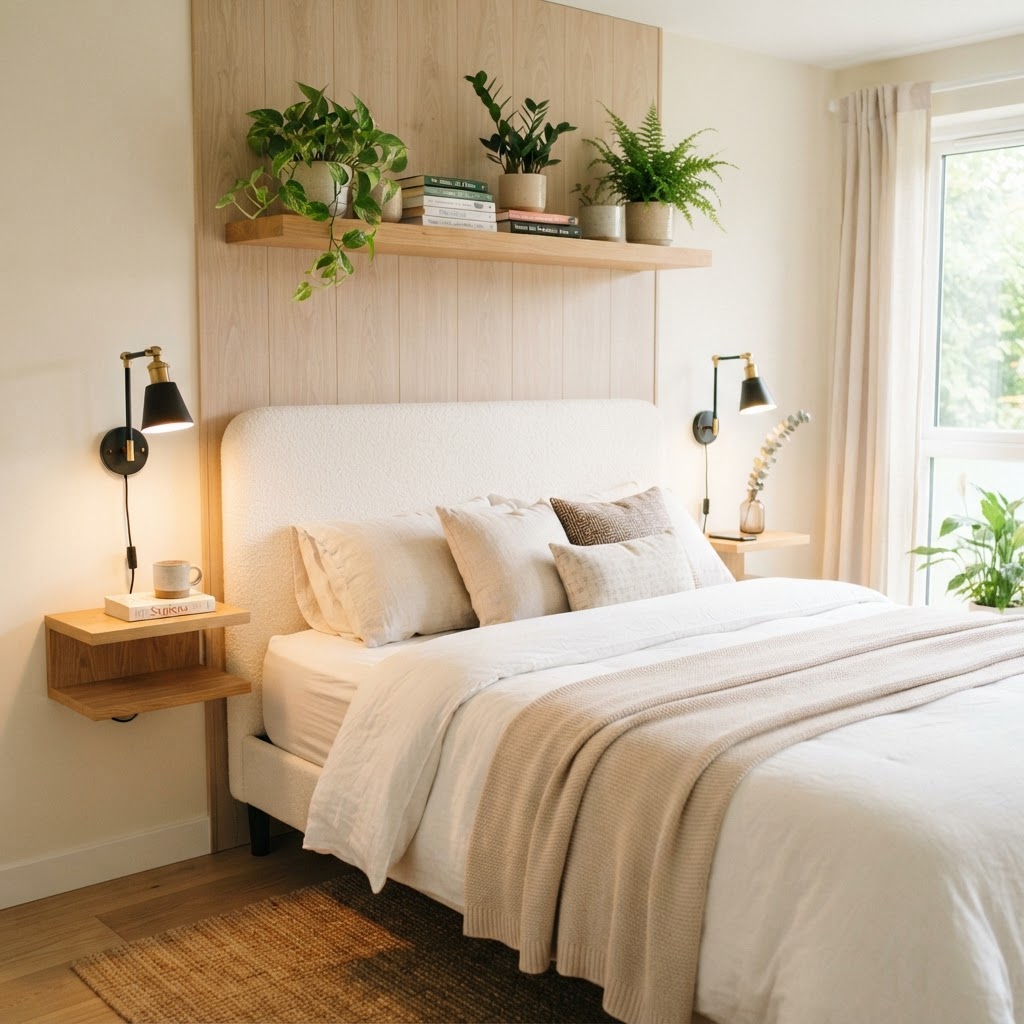
Wall-mounted furniture keeps the floor clear, making small spaces feel larger.

Effective furniture selection in a small bedroom requires prioritizing vertical storage and pieces that serve multiple roles to keep the floor clear. Opt for wall-mounted nightstands or floating shelves, which provide necessary surface area for essentials while maintaining an open line of sight across the floor. Design psychology indicates that exposing 30% more floor space can make a room appear significantly larger. When selecting larger pieces, avoid bulky frames; instead, choose low-profile, sleek designs that draw the eye upward and utilize vertical space for decor, effectively tricking the brain into perceiving a higher volume of space.

The Power of Multi-Functional Pieces

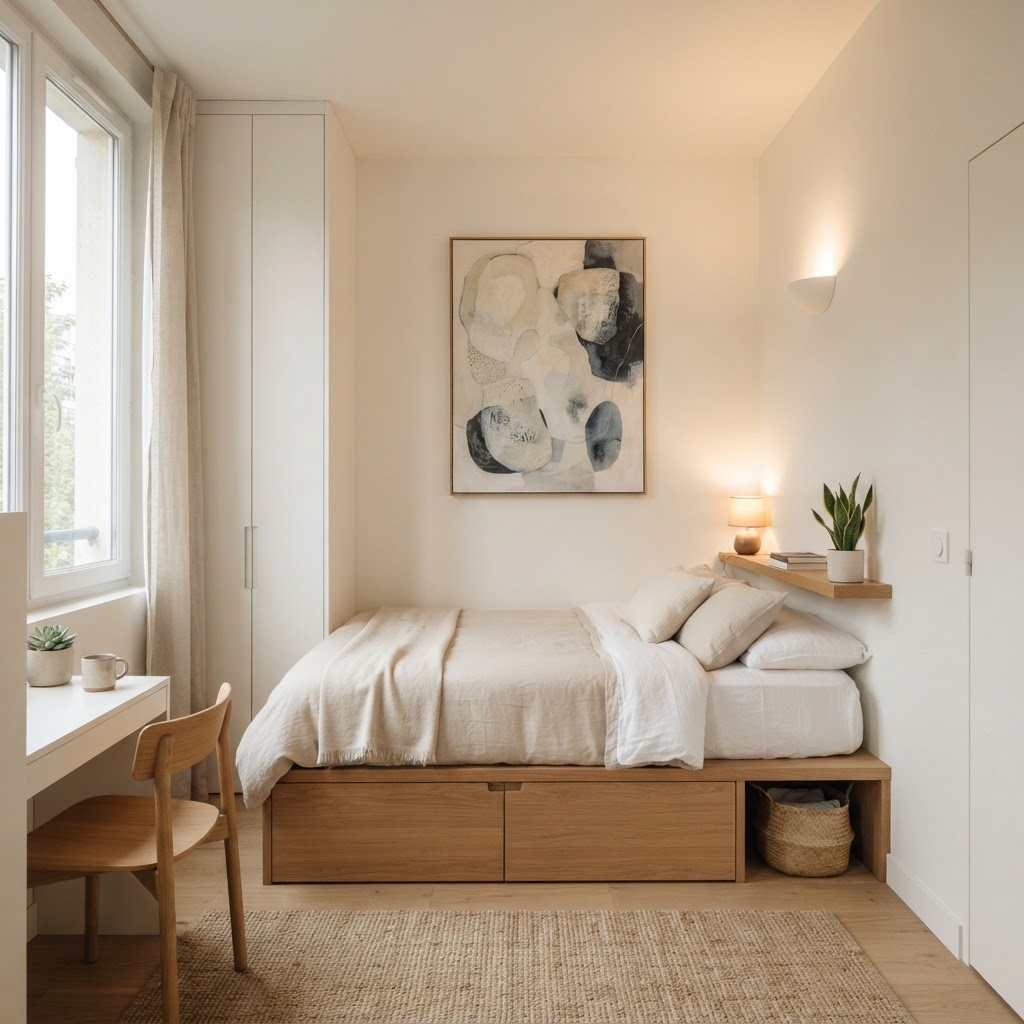
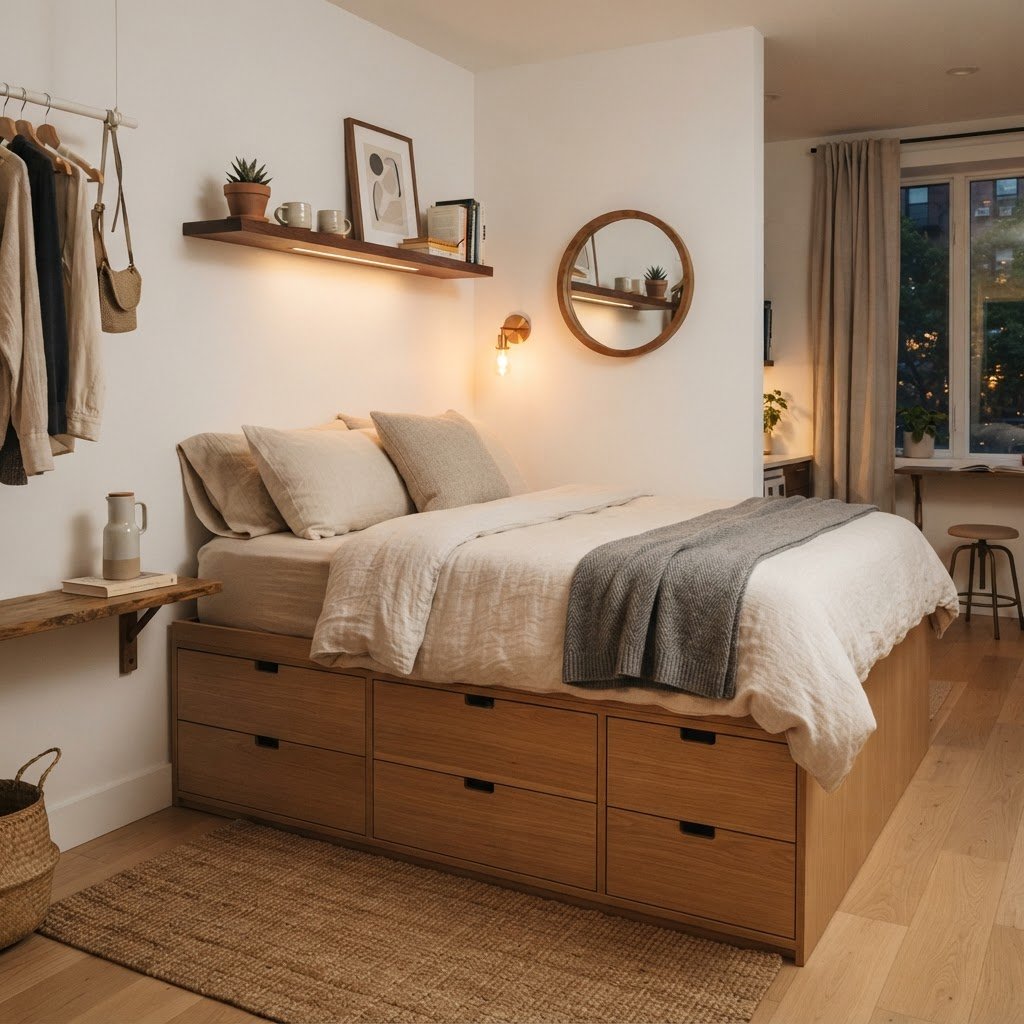
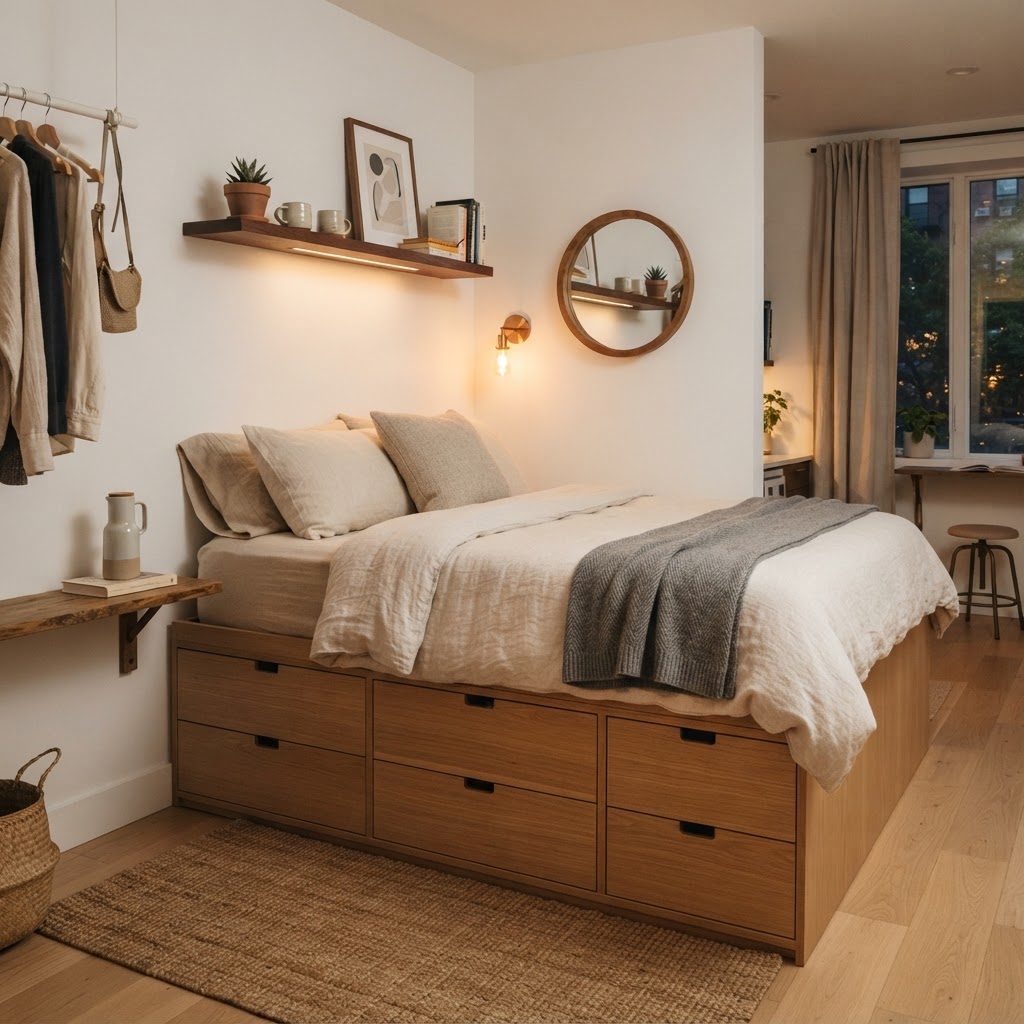
Look for a bed frame that offers built-in storage underneath. Hidden drawers allow you to tuck away seasonal clothing or extra linens, which is crucial for maintaining a clean aesthetic. When you remove visual noise from the floor, you immediately reduce stress levels. Remember, in small space interior design, the more floor you can see, the more spacious the room will feel. Avoid heavy, ornate bed frames that dwarf the room, and instead opt for low-profile, sleek designs that keep the line of sight clear.

Mastering the Minimalist Color Palette

One large focal point can make a small room feel sophisticated and intentional.

Moving away from clinical white toward a warm neutral palette creates a more sophisticated and cohesive bedroom environment. Utilize a color scheme anchored by shades like oatmeal, taupe, soft greys, or muted terracotta to provide an airy quality while retaining a sense of organic warmth. A professional strategy involves using a 60-30-10 color rule: 60% for the dominant neutral wall color, 30% for secondary textures like bedding or rugs, and 10% for dark accent pieces. This layering of tones creates depth, ensuring the room remains cozy and intentional rather than washed out.

Creating Contrast Without Clutter

While neutrals are your base, you should introduce subtle contrast to prevent the room from feeling washed out. Use darker tones for grounding elements, such as a black metal lamp base or charcoal pillow shams. These darker accents act as punctuation marks in your design, drawing the eye and adding a professional, sophisticated finish to the overall bedroom aesthetic.

Strategic Lighting to Soften the Atmosphere

Strategic lighting design is the most effective way to eliminate harsh shadows and establish a serene, warm ambiance in a confined bedroom. Avoid relying on a single overhead light, which can create flat, clinical lighting; instead, implement a layered lighting scheme using a combination of bedside lamps, wall-mounted sconces, and hidden LED strips. For optimal results, ensure all bulbs fall within the 2700K to 3000K color temperature range. This golden-hour spectrum suppresses cortisol production, making it physiologically easier to transition into sleep compared to the 4000K+ blue-tinted light common in standard household bulbs.

The Warmth of Golden Hour Lighting

Focus on lampshades made from fabric or paper, which diffuse light and create a soft, golden glow. Avoid blue-tinted cool LEDs at all costs, as they contribute significantly to that unwanted ‘cold’ feeling. By selecting bulbs with a color temperature between 2700K and 3000K, you mimic the natural light of sunset, which promotes relaxation and prepares your mind for sleep.

Decluttering as a Design Tool

Maintaining a minimalist bedroom requires a strict ‘one-in, one-out’ policy to prevent the accumulation of visual noise that elevates cortisol levels. Studies suggest that cluttered environments can reduce focus and increase anxiety, particularly in small spaces where every object occupies a significant percentage of the total visual field. Dedicate time each week to clear off horizontal surfaces, ensuring that only items that provide daily utility or profound personal joy remain in view. Utilizing storage organizers inside closets or drawers is the most effective way to keep essential, yet unappealing, items hidden from sight while preserving a calm design aesthetic.

Item Type Storage Solution Benefit
Bedding Under-bed bins Clears floor space
Books Floating wall shelves Keeps surfaces empty
Clothing Closet organizers Reduces visual noise
Tech cords Cable management boxes Prevents tangled messes

Bringing the Outdoors In

Nature is inherently warm and grounding. Adding a single, well-placed plant can completely change the mood of a minimalist room. A snake plant or a hanging pothos adds a vibrant splash of green that breathes life into the space. Not only do plants improve indoor air quality, but they also act as living decor that doesn’t feel like ‘stuff.’ Avoid overwhelming the room with a jungle of pots; choose one or two sculptural plants that complement your design theme.

Personalization Through Meaningful Art

Minimalism is often mistaken for a lack of personality, but it should actually be the opposite. A truly successful minimalist space reflects your identity by highlighting only your most meaningful possessions. Instead of a gallery wall covered in dozens of small frames, choose one large, impactful piece of art that speaks to you. A single, high-quality print or a piece of local craft can serve as a focal point. This maintains the clean, airy aesthetic of the room while ensuring it feels like your home rather than a staged catalog room.

FAQ

How can I make a small minimalist bedroom feel warmer?

To make a small room feel warmer, replace cool white tones with warm neutrals like cream, oatmeal, or taupe. Layering textiles such as wool throws, linen curtains, and sheepskin rugs adds tactile depth that prevents the space from appearing sterile or cold.

What are the best colors for a small minimalist bedroom?

Stick to a monochromatic palette of warm neutrals, including soft greys, mushroom, beige, and warm white. These colors bounce light around the room, creating an illusion of space while maintaining an inviting, cozy atmosphere that feels intentional rather than empty.

Should I use large furniture in a small bedroom?

Generally, no; however, one large, well-scaled piece of furniture can sometimes anchor a room better than several small, cluttered items. Prioritize low-profile furniture with clean lines to keep the line of sight clear and maintain an open, airy feeling in limited square footage.

How much lighting do I need in a small bedroom?

Layer your lighting by using at least three light sources, such as a bedside lamp, a dimmable wall sconce, and subtle ambient accent lighting. Always choose warm bulbs between 2700K and 3000K to avoid the harsh, clinical feel of cooler, blue-toned LED lighting.

How do I store items in a small minimalist room?

Utilize vertical space with floating shelves and choose furniture with hidden storage, such as bed frames with integrated drawers. The ‘one-in, one-out’ rule is essential: for every new item you introduce to the room, remove one item to storage or donation to maintain a clean aesthetic.

Aesthetic Table and Floor Lamps to Elevate Your Home Decor

Aesthetic table and floor lamps elevate home decor by serving as dual-purpose sculptural art and essential lighting layers that define atmosphere, functionality, and spatial depth. Choosing the right lamps requires balancing Kelvin color temperatures, intentional furniture placement, and mixing tactile materials to transform mundane rooms into sophisticated, well-lit retreats.

Understanding the Role of Layered Lighting

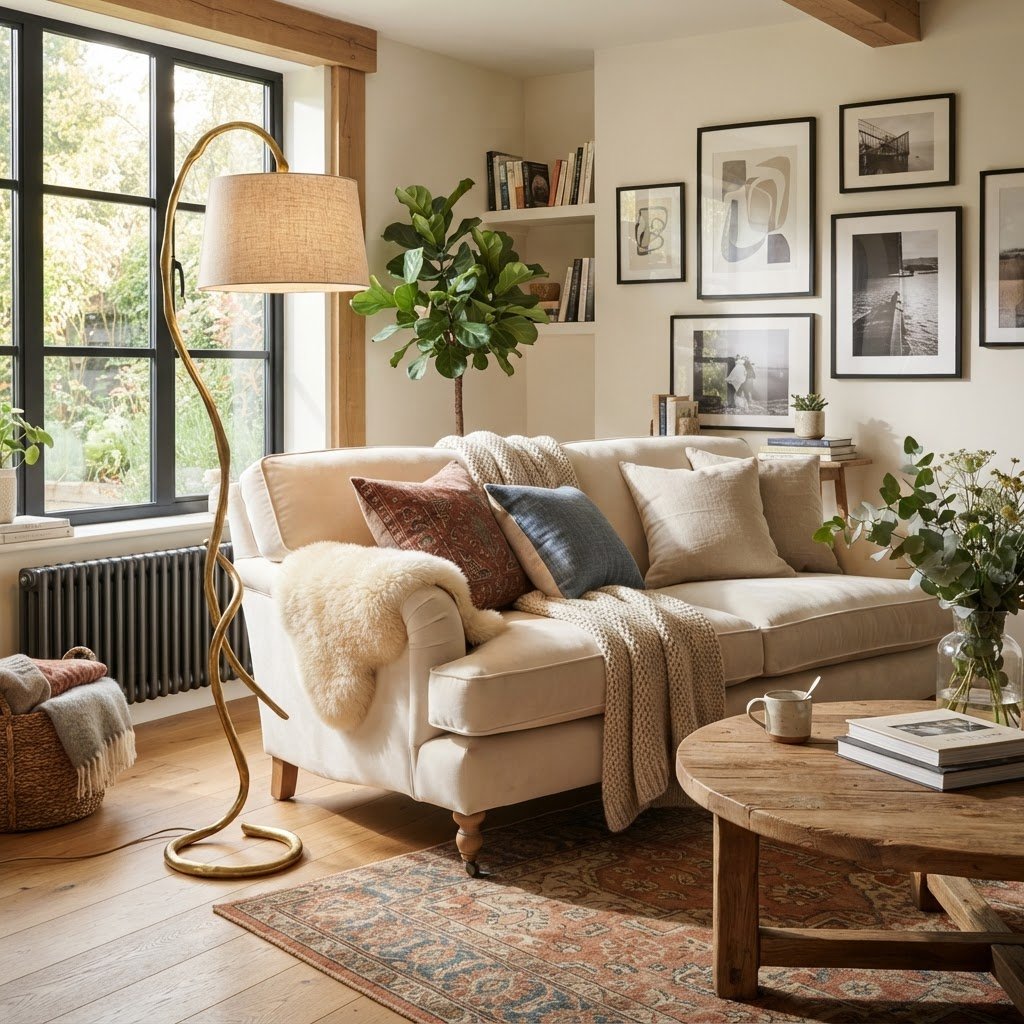
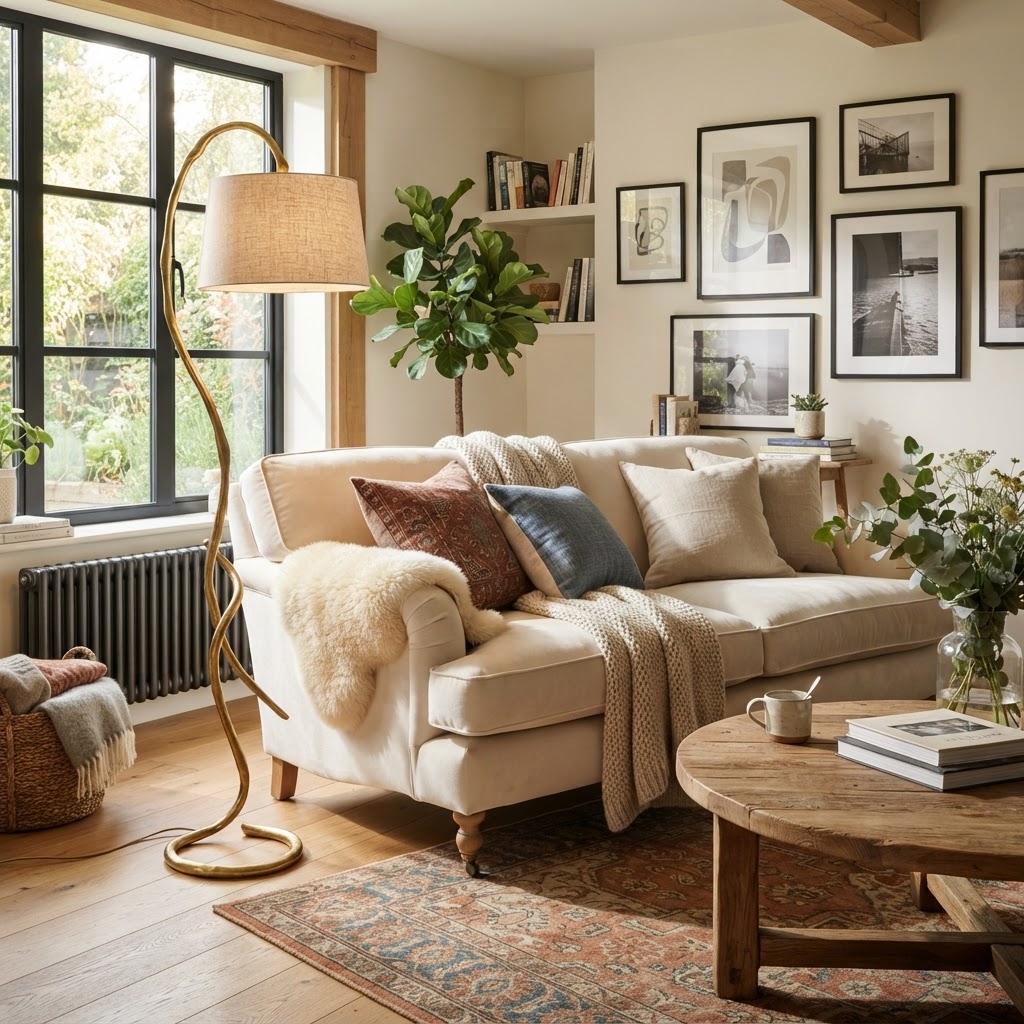
A brass floor lamp adds a touch of modern luxury to the living area.

Mastering interior design depends on the concept of layered lighting, which replaces flat, single-source overhead illumination with a multidimensional approach. A successful lighting scheme integrates three distinct types: ambient, task, and accent lighting to ensure every corner of a room serves a specific aesthetic and functional purpose.

Ambient vs. Task vs. Accent Lighting

Ambient light provides the necessary base layer for general visibility, usually handled by recessed or ceiling fixtures. Task lighting is the focused illumination required for specific activities like reading, cooking, or precise office work. Aesthetic table and floor lamps act as the critical bridge, offering adjustable task-focused beams while contributing to the overall ambient glow. Finally, accent lighting adds professional-grade depth by drawing the eye toward architectural features, artwork, or bookshelves. By combining these three layers, you create a room that feels intentional rather than haphazard. A tall floor lamp placed in a dim corner provides essential ambient verticality, while a task-specific table lamp creates a functional reading nook. This strategic interplay ensures your space feels lived-in, balanced, and sophisticated.

Choosing Between Floor and Table Lamps

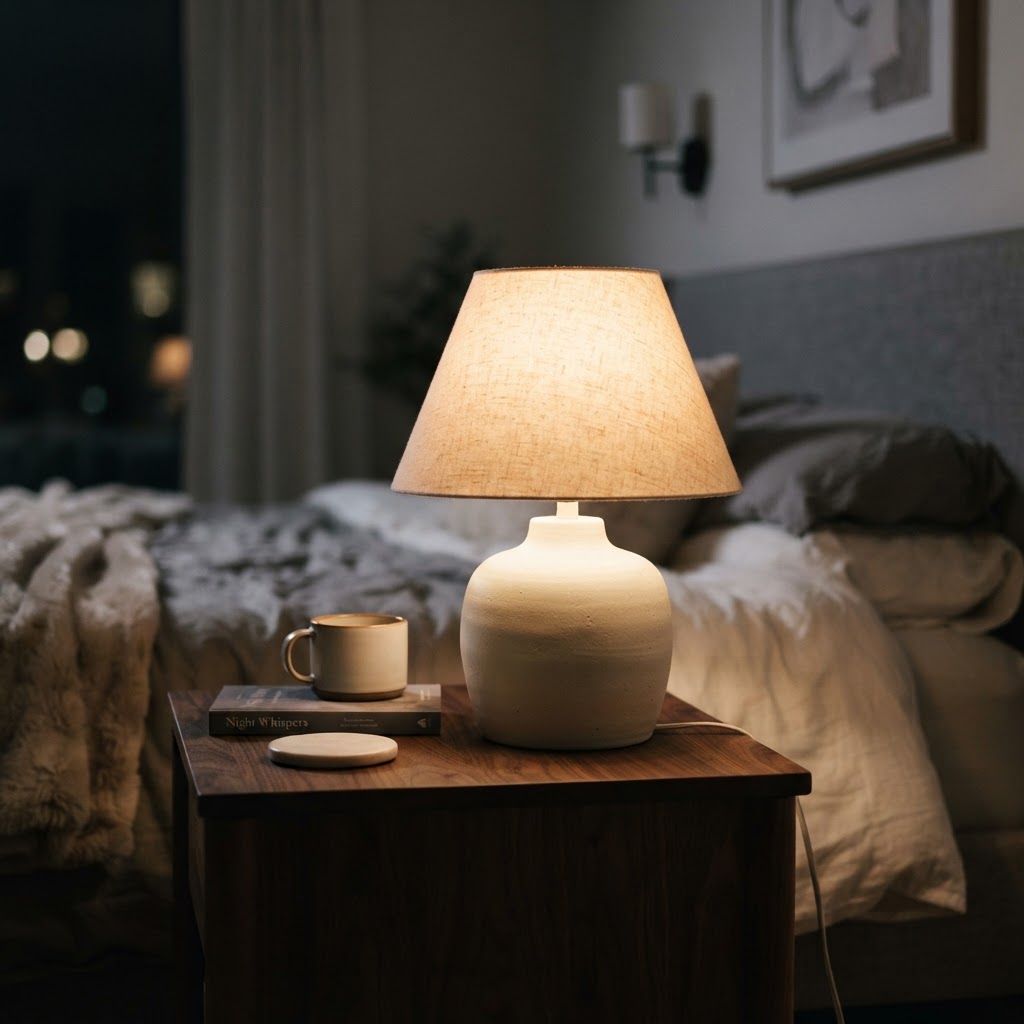
Textured ceramic lamps provide a warm, intimate glow for bedrooms.

Selecting the right fixture depends on the scale, height, and function of your furniture within a room’s layout. Floor lamps are architectural tools used to anchor large seating groups and break up horizontal lines, while table lamps offer the granular intimacy required for desks, nightstands, and console tables.

Feature Floor Lamp Table Lamp
Ideal Use Ambient/Task layering Precision task lighting
Placement Corners/Beside sofas Side tables/Consoles
Visual Impact High/Architectural Intimate/Decorative
Height 5–6 feet tall 20–30 inches tall

Floor lamps excel at adding verticality, which helps draw the eye upward and makes ceilings appear higher. When placing them near a sofa, ensure the light source is positioned to shine over the shoulder of the seated person. Table lamps, conversely, require precise height calibration; the bottom of the lampshade should sit at your eye level when seated to prevent direct bulb glare while maximizing light coverage on your work surface.

Modern Design Trends for 2024

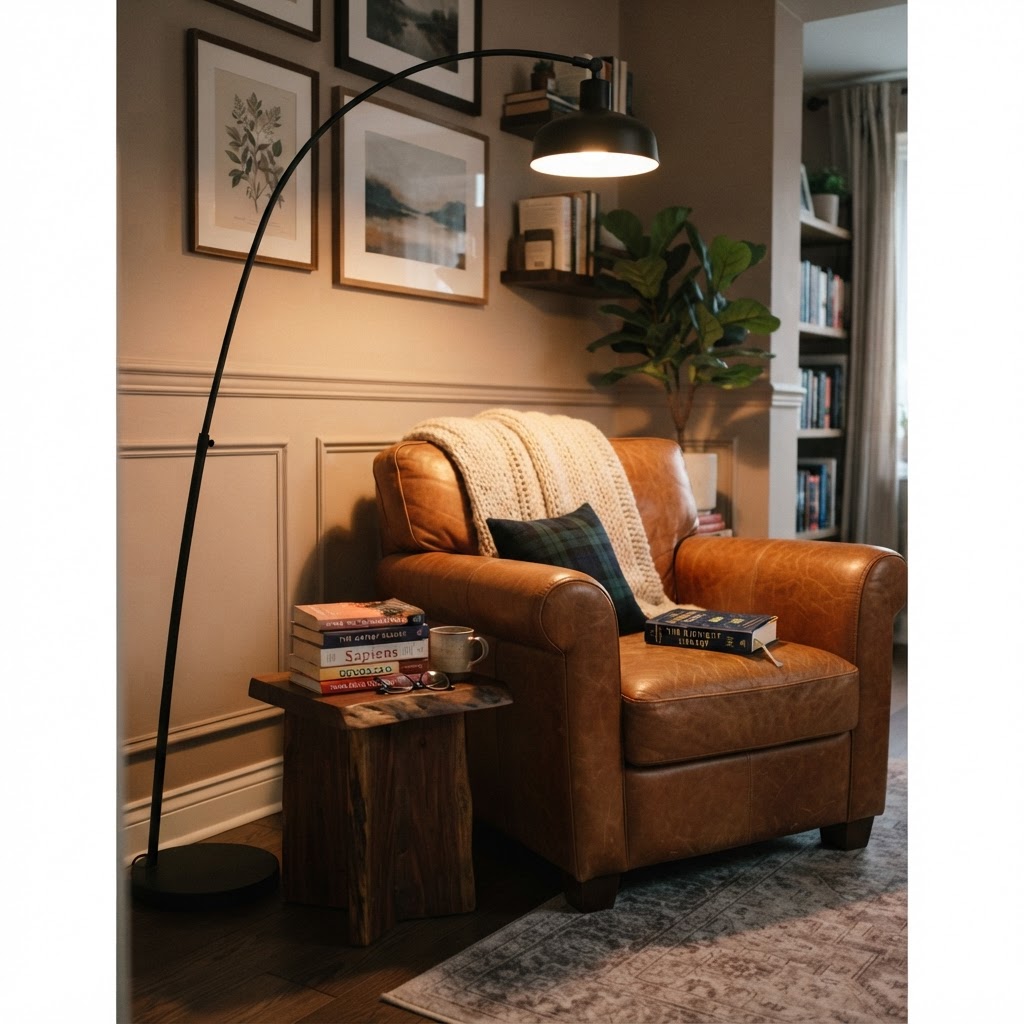
Arc floor lamps are perfect for creating a functional reading nook.

Interior design trends for 2024 have moved away from rigid industrial aesthetics toward organic silhouettes, tactile finishes, and the high-contrast appeal of mixed-media construction. This year’s focus is on pieces that feel like hand-crafted, sculptural elements rather than mass-produced retail items.

The Rise of Organic Curves

Organic, fluid shapes are currently dominating the market, with lighting designs mimicking mushrooms, river pebbles, and flowing water. These shapes provide a sense of movement in minimalist spaces, acting as focal points that break the monotony of straight lines. Designers are favoring materials that provide a soft tactile experience, such as raw textured ceramics, hand-blown frosted glass, and brushed brass. By incorporating these softer shapes, you introduce a layer of comfort and visual interest that feels premium without appearing overly formal.

The Allure of Mixed Materials

Combining contrasting materials is the fastest way to add depth and luxury to a home interior. For example, a heavy marble base paired with a light, translucent linen shade creates an immediate tension between cold, solid earthiness and soft, diffused warmth. Experts suggest mixing iron with glass or warm brass with dark wood to create a sophisticated, curated feel. These layered material choices provide a richness that makes a room feel professionally designed and deeply personal.

Styling Tips for Aesthetic Impact

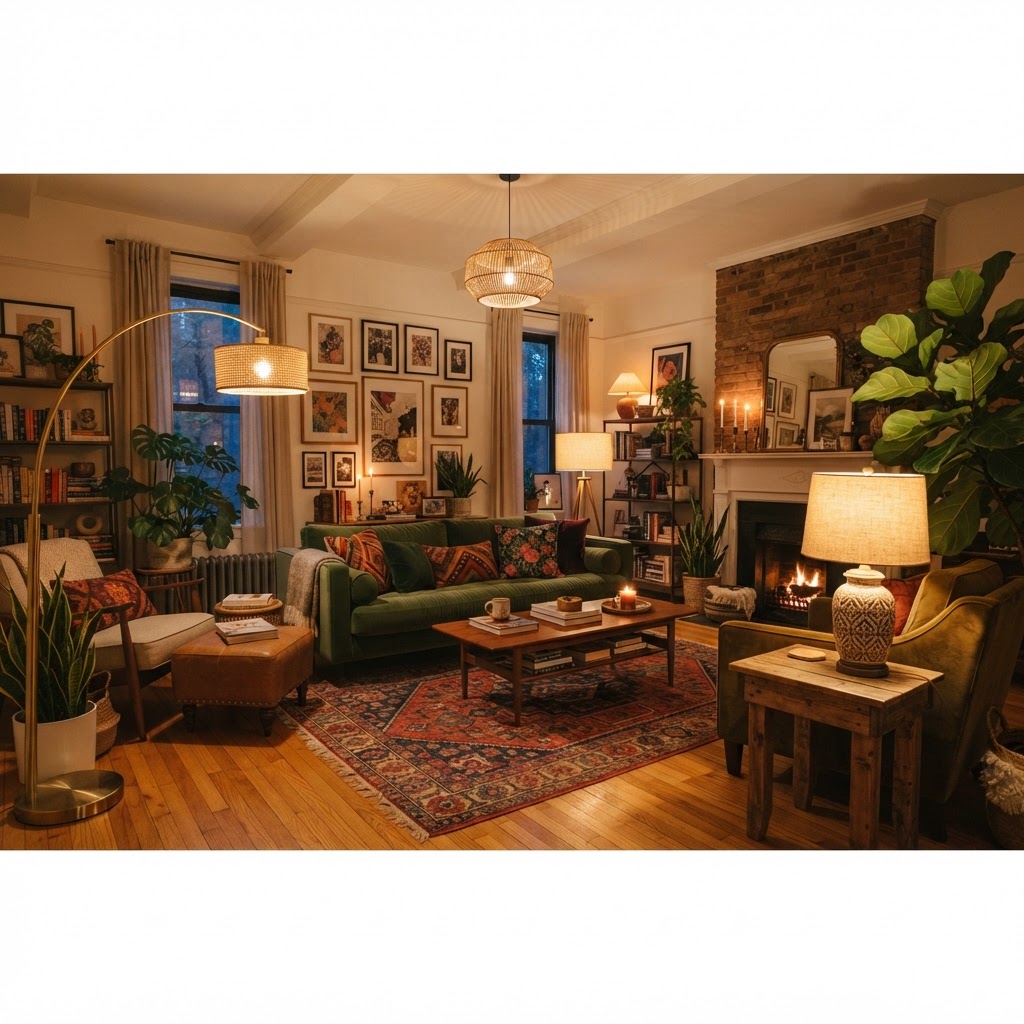
Layered lighting creates a balanced and inviting home environment.

Strategic lamp placement is the difference between a high-end space and a cluttered one, requiring a focus on identifying and eliminating “dead zones” where shadows collect. By using lamps to illuminate dark corners, you can visually expand the dimensions of your room while adding a warm, inviting glow.

For traditional or transitional layouts, use matching pairs of table lamps on either side of a console table to create symmetry, which naturally suggests tidiness and balance. If your home leans toward modern or eclectic styles, try grouping multiple lamps of varying heights and textures on a surface, ensuring they share a unified color palette to maintain cohesion. When styling a reading nook, ensure the light source is placed slightly behind the seated area to provide directed illumination for reading without causing harsh reflections on surfaces.

How to Select the Right Light Bulbs

Selecting the correct light bulb is as critical as choosing the fixture itself, with color temperature being the most significant factor for home comfort. Aim for “warm white” bulbs, ideally between 2700K and 3000K, to replicate the golden, psychological comfort of the morning sun.

Avoid the “daylight” range, typically 5000K and above, as it often produces a clinical, cold blue light that feels harsh in living spaces. Additionally, prioritizing dimmable LEDs is essential for flexible living; being able to shift from high-intensity task lighting to low-intensity ambient mood lighting allows your home to transition from day to night effortlessly. For the best longevity and aesthetic, use LED filament bulbs in lamps with glass shades, as they provide a vintage look with modern energy efficiency.

Budget-Friendly Ways to Upgrade

Elevating your home lighting does not require a total overhaul, as many high-end looks can be achieved through small, budget-conscious DIY modifications. Simple changes to existing fixtures often provide the highest return on investment, particularly when targeting the lampshade or the base finish.

Replacing a standard drum shade with a pleated fabric or linen-textured version can instantly modernize a dated lamp. For metal bases that feel out of style, consider a quick coat of matte black or brushed gold spray paint, which provides a clean, contemporary finish for under $10. Hunting for vintage, high-quality ceramic or brass bases at local thrift stores is another excellent strategy; these unique pieces often offer character that new big-box store lamps lack. When paired with a modern, high-quality linen shade and a warm-temperature LED bulb, even a $15 thrifted lamp can look like a $200 designer piece.

The Psychology of Lighting

Lighting directly dictates your emotional response to a space, with harsh, overhead brightness often linked to anxiety and fatigue. Conversely, soft, diffuse lighting promotes relaxation by signaling to the brain that it is time to unwind, making high-quality lamps a vital investment in your mental well-being.

Feature Benefit
Warm Light (2700K) Promotes relaxation
Dimmability Adjusts to different moods
Diffused Shades Reduces harsh glare
Vertical Placement Defines room boundaries

FAQ

What is the ideal height for a table lamp?

The bottom of the lampshade should be at eye level while you are seated, typically between 38 and 42 inches from the floor, to prevent the bulb from glaring directly into your eyes. This height ensures the light is directed down onto your tasks while maintaining a comfortable visual balance.

What color temperature is best for a living room?

Use warm white light bulbs, specifically between 2700K and 3000K, to create a cozy and inviting atmosphere. This color range mimics the natural warmth of sunset, which promotes relaxation and makes living areas feel more welcoming and less clinical than cooler, blue-toned bulbs.

How do I fix a room that feels “flat” or “boring”?

Add depth to your room by implementing layered lighting using at least three light sources at different heights. Incorporating a mix of floor lamps for ambient light, table lamps for task light, and accent lighting for architectural highlights will instantly add visual complexity and a sophisticated feel.

Can I mix different styles of lamps in one room?

Yes, you can mix different lamp styles by keeping a common thread between them, such as a consistent finish, metal tone, or shade color. If mixing eclectic styles, group them by color or material type to prevent the decor from appearing chaotic while maintaining an intentional, curated look.

What is the benefit of dimmable lamps?

Dimmable lamps provide versatility, allowing you to instantly transition your room from a bright, energetic space for activities to a dim, intimate environment for evening relaxation. This functionality allows a single lamp to serve multiple roles throughout the day, maximizing both utility and comfort.

5 Fully Reversible Living Room Makeovers Under $100

5 Fully Reversible Living Room Makeovers Under $100

To achieve a fully reversible living room makeover under $100, focus on high-impact, temporary upgrades such as layering textiles, using removable wall adhesives, adding warm-toned lighting, incorporating low-maintenance greenery, and practicing intentional decluttering. These projects allow you to personalize your rental space without violating lease agreements or risking your security deposit.

The Philosophy of Reversible Design

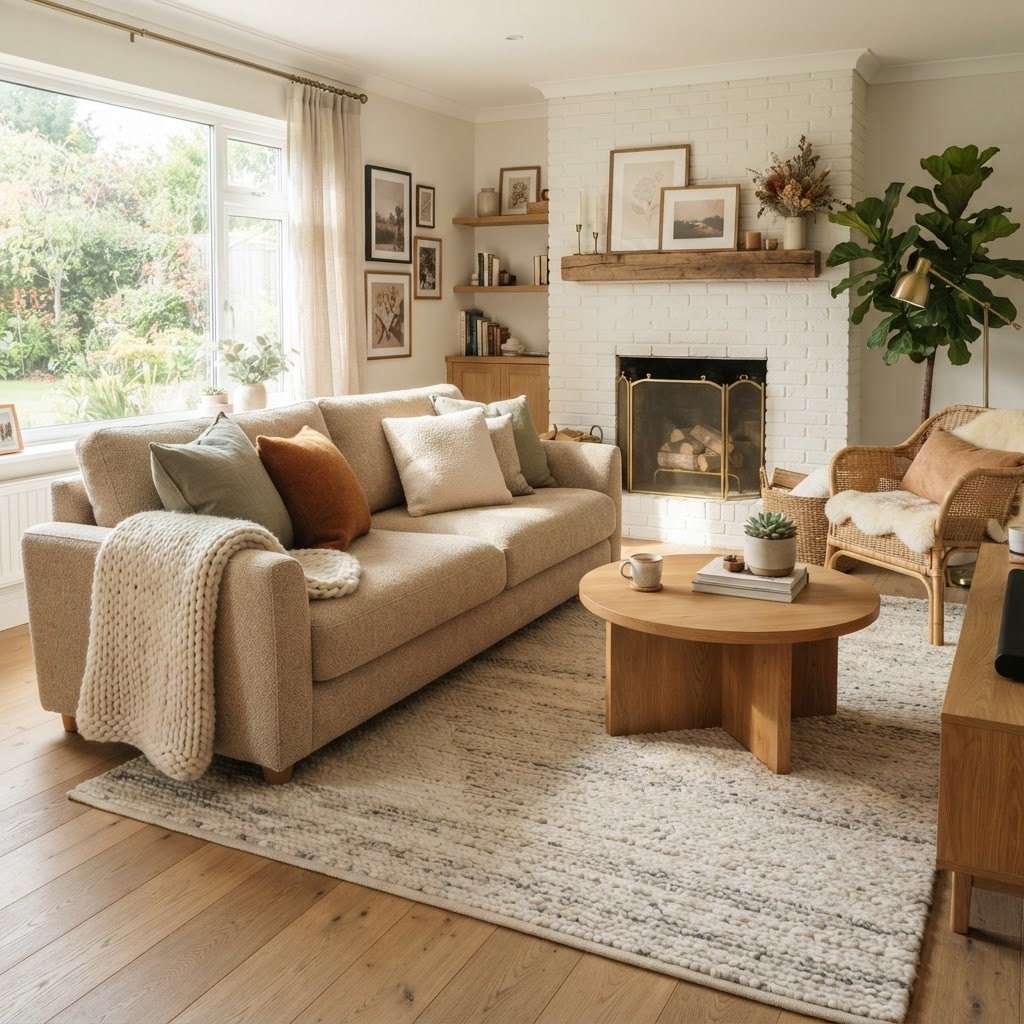
Layering textiles is the easiest way to add comfort and luxury to your living room on a budget.

The secret to successful, reversible design lies in understanding the difference between permanent installations and temporary styling. Permanent upgrades—like new light fixtures, tile backsplashes, or floor refinishing—are often off-limits for renters, but temporary styling focuses on the “envelope” of the room. When you aim to complete 5 fully reversible living room makeovers under $100, you prioritize items that can be uninstalled in an afternoon. This approach requires choosing “free-standing” decor over fixed hardware. By focusing on non-invasive changes, you treat your rental as a canvas that remains completely restorable. The strategic goal is to spend your $100 budget on items that offer the highest visual “bang for your buck” while being easily transportable. For example, rather than painting, use high-quality peel-and-stick wallpaper which costs roughly $30-$50 per roll. Always keep a toolkit of “renter-friendly” hardware, such as Command strips or non-marring floor glides, to ensure that every change is 100% reversible. This design methodology shifts the focus from structural renovation to aesthetic layering, allowing you to create a high-end look without leaving a single mark behind on your landlord’s property.

Why Budget Design Matters

Design is not about the price tag of your furniture; it is about the story your room tells. By working within a $100 budget, you are forced to be more creative and intentional with your selections. This constraint often leads to more unique, personalized spaces that reflect your personality rather than just mirroring a catalog page. Focusing on items that can be repurposed or moved ensures that your investment continues to pay dividends long after you decide to redecorate again. When you limit your spending, you naturally gravitate toward multi-functional items, such as a decorative tray that acts as a coffee table organizer or a throw blanket that adds both texture and warmth.

Feature Permanent Renovation Reversible Design
Cost $500 – $5,000+ $20 – $100
Time to Undo Days/Weeks < 1 Hour
Deposit Risk High None
Mobility Stays with property Travels with you

1. The Textile Refresh: Layering for Luxury

Removable wall art creates a sophisticated, renter-friendly focal point without damaging the walls.

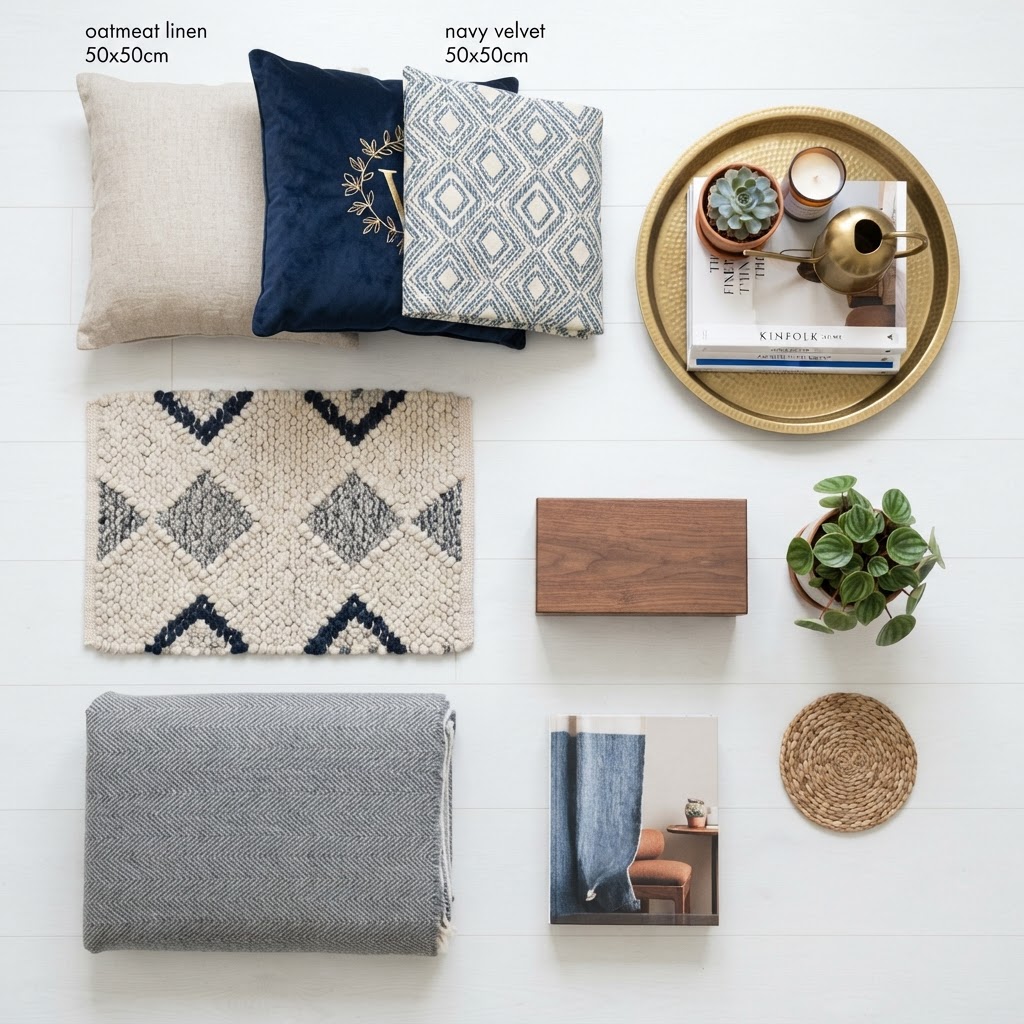
Textiles are the most impactful elements in any living space because they dominate the largest surface areas of your furniture. A neutral, bland room can look instantly expensive with the addition of high-quality textures. To pull off this makeover for under $100, head to local discount retailers for textured cushion covers, a plush throw blanket, and a low-profile area rug runner. The key here is color coordination; stick to a cohesive palette that ties in with your existing furniture pieces. By investing roughly $30 in a mix of textures—like faux-fur, linen, and chunky knits—you create a sophisticated “layered” look that design professionals use to make spaces feel lived-in and luxurious. A $30-$40 area rug runner can define a seating zone, effectively anchoring your sofa and coffee table without requiring adhesive tape or nails. When selecting fabrics, look for machine-washable options, as this ensures your investment remains clean and refreshed over the long term. Remember, the goal is to introduce contrast; pair a smooth leather cushion with a tactile, heavy-knit throw to create visual depth that draws the eye and makes the sofa the focal point of the room. This approach is entirely reversible, as these items are simply placed, not installed.

Mixing Textures and Patterns

Do not be afraid to mix materials. Pair a soft faux-fur pillow with a linen-blend cushion and a heavy knit throw. The contrast between these textures adds depth to your sofa, creating a visual richness that feels curated. When choosing an area rug, ensure it is thin enough to layer over existing carpet or to lay flat on hardwood without needing permanent backing. This simple update can completely change the tone of your living area without leaving a single mark behind.

2. Wall Treatments: Art Without Commitment

Warm lighting and indoor plants bring life and a welcoming atmosphere to any living space.

Blank walls are the biggest design obstacle in rental properties, but modern removable materials allow you to add pattern and personality without the permanence of paint. Removable wallpaper and vinyl decals offer a massive transformation for a very small price, typically starting at $20-$40 for a single accent roll. You can find high-quality patterns—from geometric shapes to botanical prints—at many online retailers that specifically cater to the renter market. A single feature wall can serve as the focal point for one of your 5 fully reversible living room makeovers under $100, drawing the eye and adding architectural interest where none existed before. If you prefer a more gallery-style aesthetic, use medium-sized command strips to hang prints, which allows you to rearrange your layout as frequently as you like without damaging the drywall or plaster. Always check that the adhesive is rated for interior wall paint to avoid paint peeling upon removal. By treating your wall as a temporary installation space, you can customize your environment with colors and styles that would otherwise be restricted by lease agreements. This approach turns an otherwise sterile room into a curated space that feels uniquely yours.

Selecting the Right Adhesives

Always test a small, inconspicuous patch of your wall before applying any adhesive product. While most modern temporary wallpapers are designed to be damage-free, different wall surfaces respond differently to adhesives. Look for products labeled specifically as “renter-friendly” or “low-tack.” If wallpaper feels too daunting, consider creating a gallery wall using heavy-duty poster putty or command strips, which hold frames securely without damaging the plaster or drywall.

3. Lighting: Mood and Atmosphere

Curated styling with essential decorative pieces helps achieve a professional interior design look.

Overhead lighting is often harsh and clinical in rentals, but you can override this with layers of warm, ambient illumination for less than $100. By introducing a trio of lights—a floor lamp, a plug-in pendant, and smart LED bulbs—you can transform the “mood” of a room for approximately $80-$90 total. A sculptural floor lamp ($40-$50) adds height and fills an empty corner, while a plug-in pendant light ($25-$30) can be draped over a seating area to create a cozy, defined “zone.” Investing in smart, color-changing LED bulbs ($15-$20) allows you to transition from bright, daylight-balanced light for reading to a warm, 2700K sunset glow for movie nights. Unlike hardwired fixtures, these portable solutions travel with you, making them a high-value investment for any renter. Lighting acts as the “jewelry” of a room; it provides dimension and sparkle that makes a space feel finished and professional. If your room lacks natural light, place your floor lamp near a mirror to bounce light around the room, which creates the illusion of more space. This lighting strategy is the fastest way to hide outdated carpet or wall colors by simply shifting the focus to warm, well-lit decor items.

The Power of Soft Glow

Place your floor lamp in a dark corner to visually expand the room. Use the plug-in pendant to define a “reading nook” area, effectively zoning your living space without moving heavy furniture. When you eventually move out, these items go with you—unlike hardwired light fixtures. Lighting acts as the “jewelry” of a room, adding sparkle and dimension that makes a space feel finished and professional.

4. Greenery and Vertical Displays

Plants bring a living, breathing energy to a space that no decor item can replicate, providing both color and organic shape to a room. A few well-placed indoor plants, such as Snake Plants or Pothos, can thrive in moderate light and act as living art. To keep costs low, buy smaller pots ($5-$8 each) and decorative baskets ($10-$15) that add texture to your floor. You can create a vertical plant display by using an existing bookshelf or an inexpensive tension-rod ladder shelf that doesn’t need to be wall-mounted. For a $100 total budget, you can easily acquire 3-4 healthy plants and decorative housing. If you are worried about plant maintenance, high-quality artificial plants are a viable alternative, though they lack the air-purifying benefits of real specimens. Arrange your greenery in clusters of three; design professionals use this “odd number rule” to create a more natural and balanced visual flow. By placing plants at varying heights—some on the floor, some on side tables—you add layers of visual interest that distract from less desirable architectural features of your rental. The cost of greenery is remarkably low compared to the visual value it adds, making it an essential component of any low-budget, high-impact living room transformation.

Budget-Friendly Plant Styling Tips

Use baskets to hide plastic nursery pots, which keeps the look clean and intentional. If you are worried about plant maintenance, high-quality artificial plants have come a long way. They provide the same sculptural silhouette without the need for watering. Arrange them in clusters of three—a design rule that suggests grouping objects in odd numbers creates a more natural and balanced visual flow.

5. Curated Decluttering and Styling

Sometimes the best makeover is subtraction rather than addition, as “clutter noise” can make even the most beautiful room feel chaotic. The final of our 5 fully reversible living room makeovers under $100 involves the art of “curated styling,” which essentially costs $0 in labor. Take every item off your shelves and coffee tables, then carefully reintroduce only the objects that serve a distinct purpose or bring you genuine joy. With the remaining $10-$20 of your budget, purchase one or two “anchor” items, such as a large wooden tray or a high-quality coffee table book, to consolidate smaller objects. When styling shelves, alternate between horizontal and vertical orientations to keep the eye moving; for instance, place a stack of books horizontally with a small sculptural item on top, positioned next to a tall, vertical framed print. This variety in shape and orientation is a professional design trick that prevents a space from looking stagnant. A well-curated living room feels expensive precisely because it looks intentional and free from unnecessary clutter. By practicing this rigorous edit, you allow your key decor pieces—your plants, textiles, and lighting—to actually stand out, rather than being buried under piles of unorganized magazines or miscellaneous trinkets.

Creating Visual Balance

When styling shelves, alternate between horizontal and vertical orientations. Place a stack of books horizontally, topped with a small object, next to a vertical frame or a tall plant. This variety in shape and orientation keeps the eye moving and prevents the space from looking stagnant. A well-curated living room feels expensive precisely because it looks intentional and free from unnecessary “clutter noise.”

Measuring Success: The Impact of Small Changes

When you commit to these reversible makeovers, you learn that design is a process, not a destination. You are building a collection of decor that travels with you, reflecting your evolving taste. These small updates add up to a significant change in how you perceive your home. Instead of feeling stuck in a “temporary” living situation, you feel empowered to make your mark, knowing full well that you can return the room to its original state in under an hour when the time comes to leave.
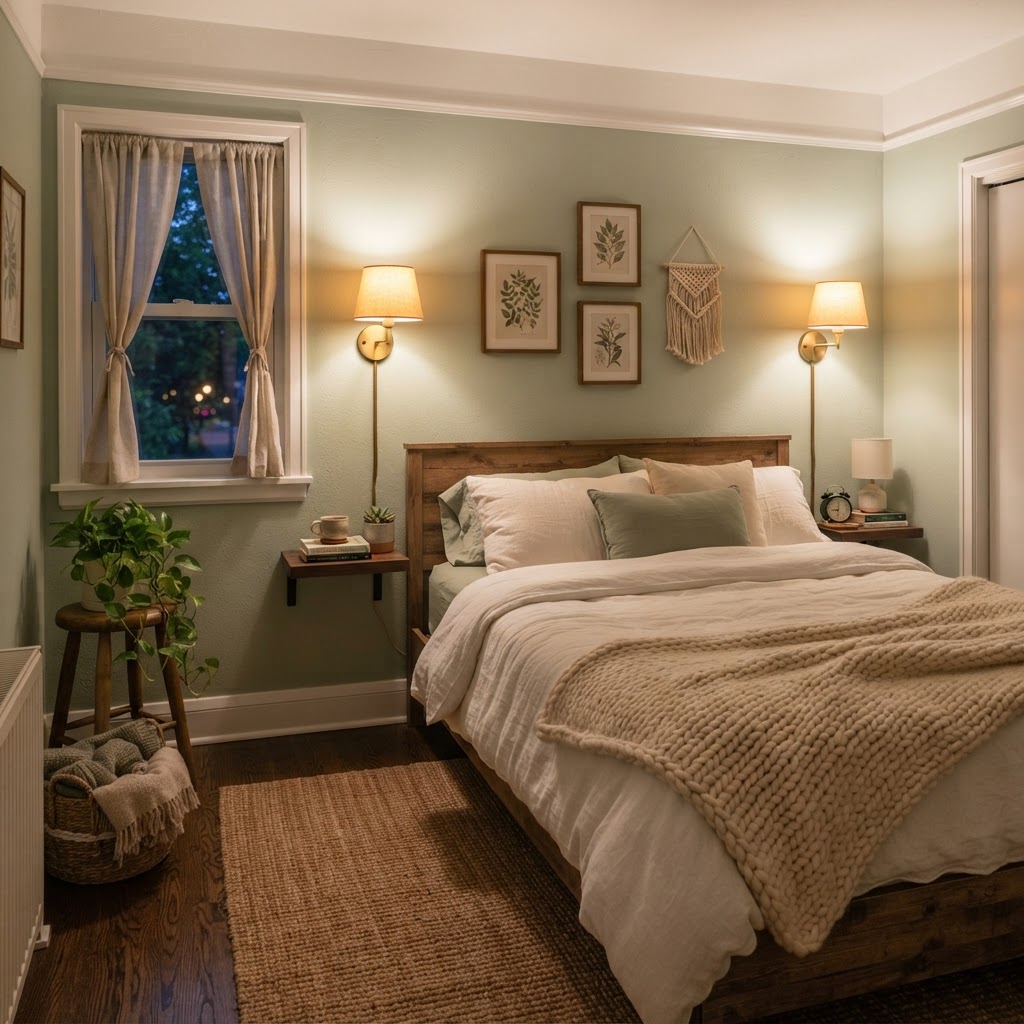
Project Type Budget Allocation Key Benefit
Textiles $30 Adds warmth and comfort
Wall Art/Decals $25 Provides immediate focal point
Lighting $20 Changes mood and atmosphere
Plants/Greenery $15 Adds organic life/texture
Styling Decor $10 Finalizes the polished look

FAQ

Q: Can you really makeover a living room for $100?

Yes, you can significantly transform a living room for under $100 by focusing on high-impact, temporary styling rather than structural renovation. By prioritizing textiles, lighting, and greenery, you can create a fresh, high-end look while keeping all items portable and reversible for future moves.

Q: What is the best way to hide ugly rental walls without paint?

Use removable peel-and-stick wallpaper or large-scale vinyl decals to cover unappealing walls. These products are specifically designed for renters and can be removed without damaging the underlying paint or drywall, making them an ideal solution for temporary wall customization.

Q: How do you make a rental living room look expensive?

To make a rental feel expensive, use the ‘layering’ technique by mixing varied textures like faux-fur, linen, and heavy knits. Combined with warm-toned lighting and intentional, curated shelf styling, these elements create a sophisticated, designer-quality atmosphere that disguises the generic nature of standard rental finishes.

Q: Do command strips really work for gallery walls?

Yes, Command strips are highly effective for creating gallery walls in rentals if you follow the weight capacity guidelines and proper application instructions. They provide a secure hold for frames and can be removed cleanly without pulling paint or leaving holes in your walls.

Space-Saving Bedroom Ideas for Tiny Apartments

Space-Saving Bedroom Ideas for Tiny Apartments

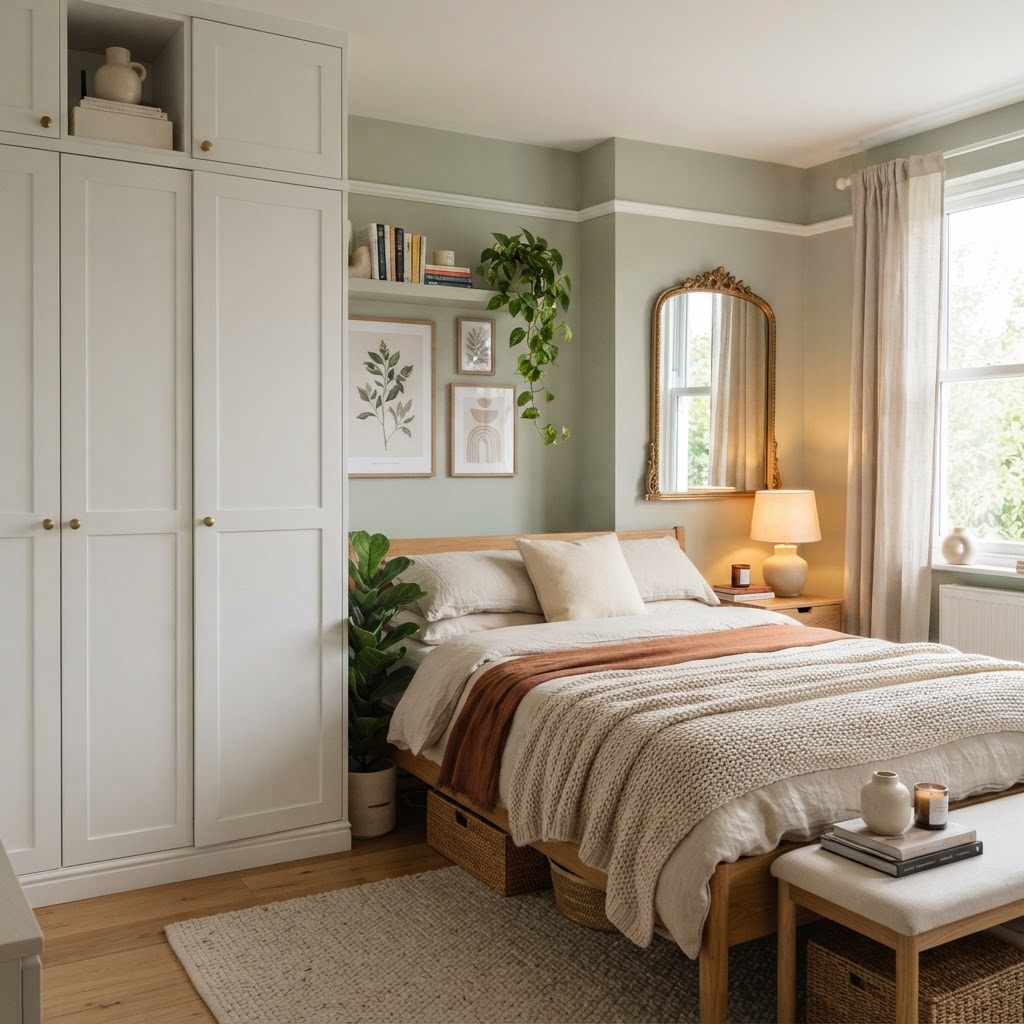
To maximize a tiny bedroom, prioritize vertical storage, multi-functional furniture like hydraulic beds, and light-layering techniques to create an illusion of space. By replacing bulky nightstands with floating shelves and keeping surfaces clear, you can transform a cramped footprint into an efficient, sophisticated, and comfortable sanctuary.

Rethinking Your Layout for Maximum Flow

The most effective way to improve flow in a small bedroom is to avoid pushing every piece of furniture against the walls, which creates a dead, cavernous center. By pulling the bed away from the wall even just a few inches, you create a “floating” effect that makes the room feel airier. If your bedroom must double as a workspace, utilize a visual divider like a tall open-back bookshelf or a folding screen. This strategy defines zones without sacrificing natural light. According to interior design standards, keeping at least 24 inches of clearance around the bed is ideal for traffic, though in tiny apartments, 18 inches is a functional minimum to maintain accessibility.

Prioritizing Your Bed Placement

Your bed is the room’s anchor, so its position determines whether your space feels claustrophobic or intentional. Placing the bed in a corner is a popular technique to reclaim square footage for a desk or lounge chair, but it requires styling to avoid a dorm-room look. Use a floor-to-ceiling oversized headboard to add professional structure. This creates a visual “anchor” that makes the corner placement look like a deliberate design choice rather than a necessity.

Layout Strategy Primary Benefit Best For
Floating Bed Increased airflow and depth Square bedrooms
Corner Placement Maximum floor space gain Rectangular/narrow rooms
Window-Centered Symmetrical, balanced look Rooms with feature windows

Maximize your footprint with a bed that offers hidden storage.

The Magic of Vertical Storage Solutions

When floor space is exhausted, your walls become your most valuable square footage for storage. Installing floating shelves above the bed, desk, or doorway allows you to store books, plants, and decorative items that would otherwise clutter limited nightstand or dresser surfaces. Aim for tall, floor-to-ceiling wardrobes; when furniture reaches the ceiling, it draws the eye upward, effectively “tricking” the brain into perceiving more height in the room. A common design rule is to mount curtains as high as possible near the ceiling to further emphasize verticality and add a layer of perceived luxury.

Creative Wall-Mounted Hacks

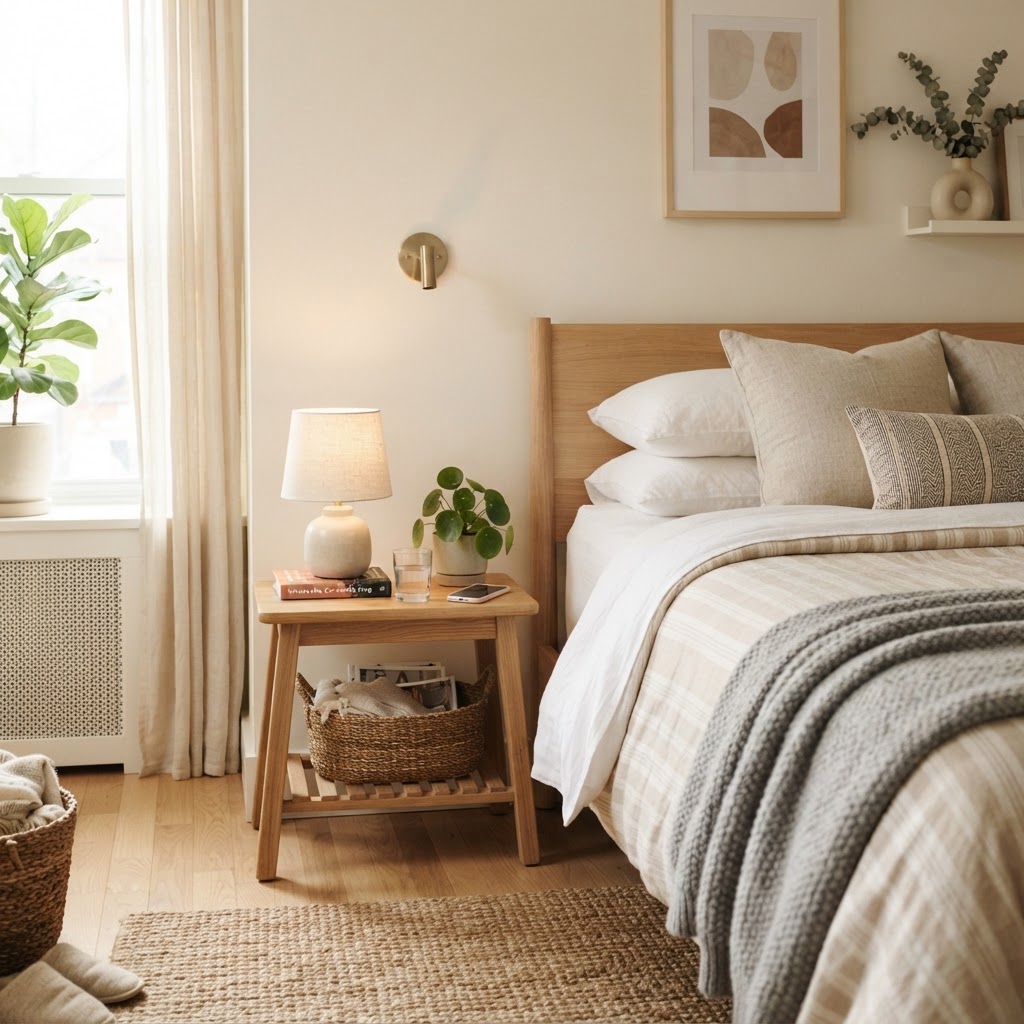
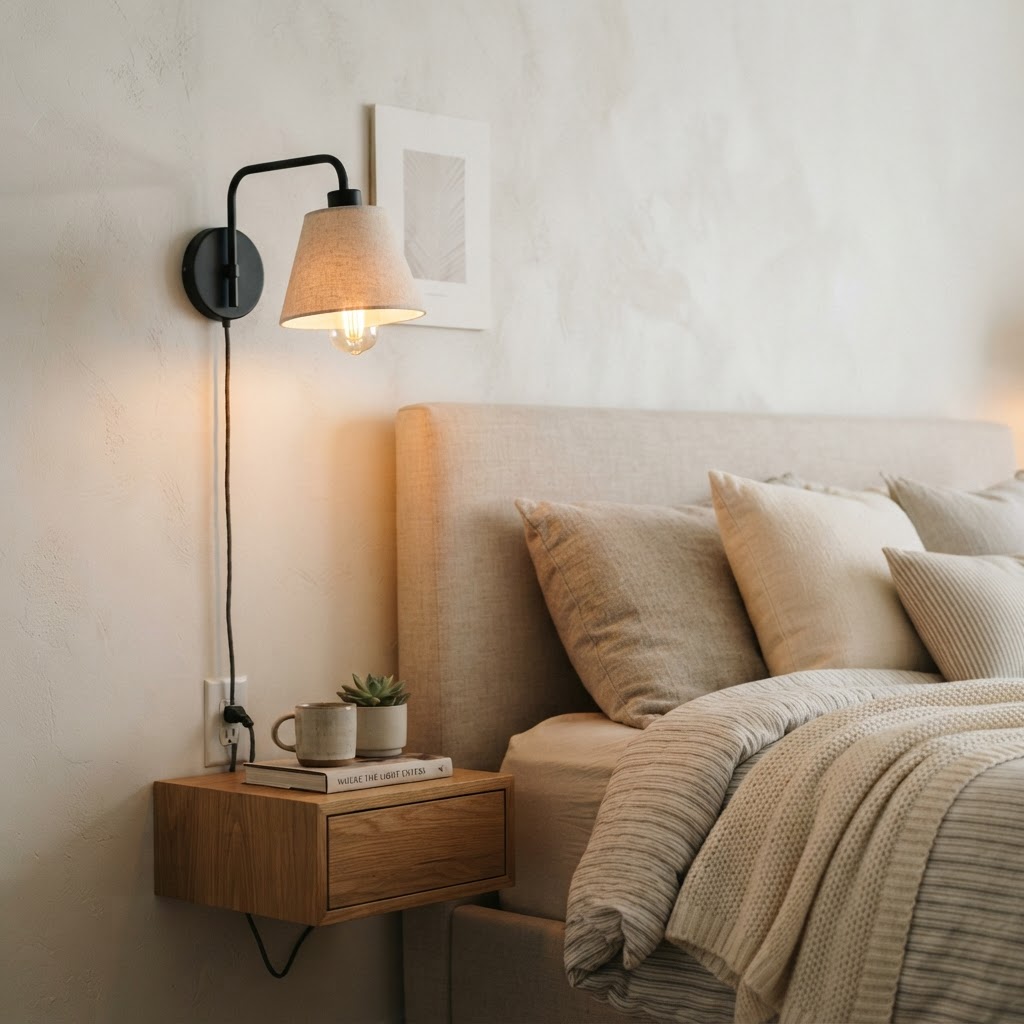
Don’t limit yourself to shelves; mount your lighting directly to the walls to eliminate the need for bulky floor lamps or traditional side tables. Wall sconces provide a high-end, hotel-like aesthetic while freeing up every square inch of your nightstand. Consider using swing-arm sconces, which provide adjustable task lighting for reading without the footprint of a table lamp. By clearing your nightstand, you reduce visual clutter, which is essential for making a tiny room feel larger and more serene.

Wall-mounted lights and shelves save precious floor space.

Investing in Multi-Functional Furniture

Every piece of furniture in a tiny apartment must perform at least two functions to justify its place in the room. Beds with built-in storage—specifically hydraulic lift-up frames—are the gold standard for small spaces, as they provide the equivalent of a dresser’s worth of storage inside the footprint of the mattress. This internal cavity is ideal for storing heavy winter coats, extra bedding, or travel suitcases that would otherwise dominate your closet. When shopping, look for furniture that is elevated on legs; seeing the floor underneath a piece of furniture creates a sense of openness that “solid-base” furniture destroys.

The Versatile Nightstand Replacement

If floor space prohibits a standard nightstand, switch to a wall-mounted floating shelf. These can be installed at the exact height you need, saving space while offering a clean, modern look. Alternatively, a small, multi-purpose stool can act as a nightstand during the day and provide an extra seat when guests arrive. This “fluid” approach to furniture prevents the room from feeling static or over-crowded, allowing you to adapt the room’s function based on the time of day.

Vertical wardrobes and mirrors create the illusion of extra space.

Brightening the Space with Strategic Lighting

Lighting is the most significant factor in changing the perceived dimensions of a room. Avoid relying on a single, harsh overhead light, which casts deep shadows in corners and makes the room feel boxed in. Instead, use a layered lighting approach by combining ambient ceiling lights, task-oriented wall sconces, and warm accent lighting like LED strips behind headboards. Placing mirrors opposite a window is a proven interior design tactic that reflects natural light deep into the room, creating an illusion of depth that can make a 100-square-foot room feel significantly larger.

Small furniture can still make a bold, personal style statement.

Keeping it Personal Through Textures

Small rooms often suffer from feeling “sterile” or “cheap” if they are too minimalist, so you must introduce texture to create warmth and personality. Incorporate tactile elements like chunky-knit wool blankets, velvet cushions, or natural jute rugs. These materials draw the eye and create a cozy, “cocoon” effect that feels intentional rather than small. Regarding your color palette, you do not have to stick to white; deep, moody colors like forest green or navy can actually make a bedroom feel more sophisticated. Just ensure the ceiling remains a crisp, matte white to prevent the room from feeling like it is closing in on you.

Organizing the Hidden Spaces

Clutter is the primary enemy of a functional small bedroom. Utilize the back of your bedroom door for over-the-door organizers to manage shoes, scarves, or beauty products. For under-bed storage, use clear, lidded bins with labels to ensure you can find items quickly without dumping contents on the floor. The goal is to ensure every item has a “home,” which prevents surface creep—the accumulation of daily items on dressers and nightstands that makes a small room feel chaotic.

Minimalist Habits for Small Living

Adopting a minimalist mindset is the most sustainable way to live in a tiny apartment. Conduct a quarterly audit of your belongings, keeping only items that serve a daily purpose or have significant emotional value. A curated collection of art or a few high-quality meaningful mementos will always look more “designed” than an overabundance of random decor. Remember that in a small space, less is always more; every item you own takes up valuable visual and physical space that could otherwise contribute to your comfort.

FAQ

Q: What is the best bed size for a very tiny bedroom?

A: A full-size bed is generally the best balance for small spaces, as it fits two people while leaving more floor room than a queen. If you are single, a twin XL or a daybed with trundle storage is often more functional than a larger bed that consumes the entire room.

Q: Can I use dark paint in a small bedroom?

A: Yes, dark paint can make a small bedroom feel like a luxurious, cozy “cocoon” rather than a small box. To succeed with dark colors, ensure your ceiling is painted a bright, clean white and that you have ample layered lighting to prevent the room from feeling like a cave.

Q: How do I store clothes without a large closet?

A: Invest in a vertical wardrobe unit that reaches the ceiling or use an open-concept clothing rack combined with under-bed storage bins. Prioritizing clothing storage that utilizes wall height rather than floor space is the most effective way to manage a limited wardrobe area in a small apartment.

Q: Should I put my bed against the wall in a tiny room?

A: Placing a bed against a wall or in a corner is a great way to save space, but you should anchor it with a headboard to make the placement look intentional. Adding wall sconces and floating shelves nearby will help frame the bed and make the corner feel like a deliberate sanctuary.

Q: How can I make a tiny bedroom look bigger instantly?

A: You can make a small bedroom look bigger by adding large mirrors, using floor-to-ceiling curtains, and choosing furniture with legs that expose the floor underneath. Keeping the floor as clear as possible and maximizing vertical wall space are the two fastest ways to increase the sense of room size.

Warm Lighting Layering Tips for a Cozy Atmosphere

Warm Lighting Layering Tips for a Cozy Atmosphere

To create a cozy atmosphere using warm lighting, prioritize bulbs within the 2200K to 3000K range and layer light across three levels: ambient, task, and accent. This strategic distribution, combined with dimmable controls and diffused fixtures, eliminates harsh shadows, reduces eye strain, and mimics the relaxing glow of sunset to improve home comfort.

The Philosophy of Layered Lighting

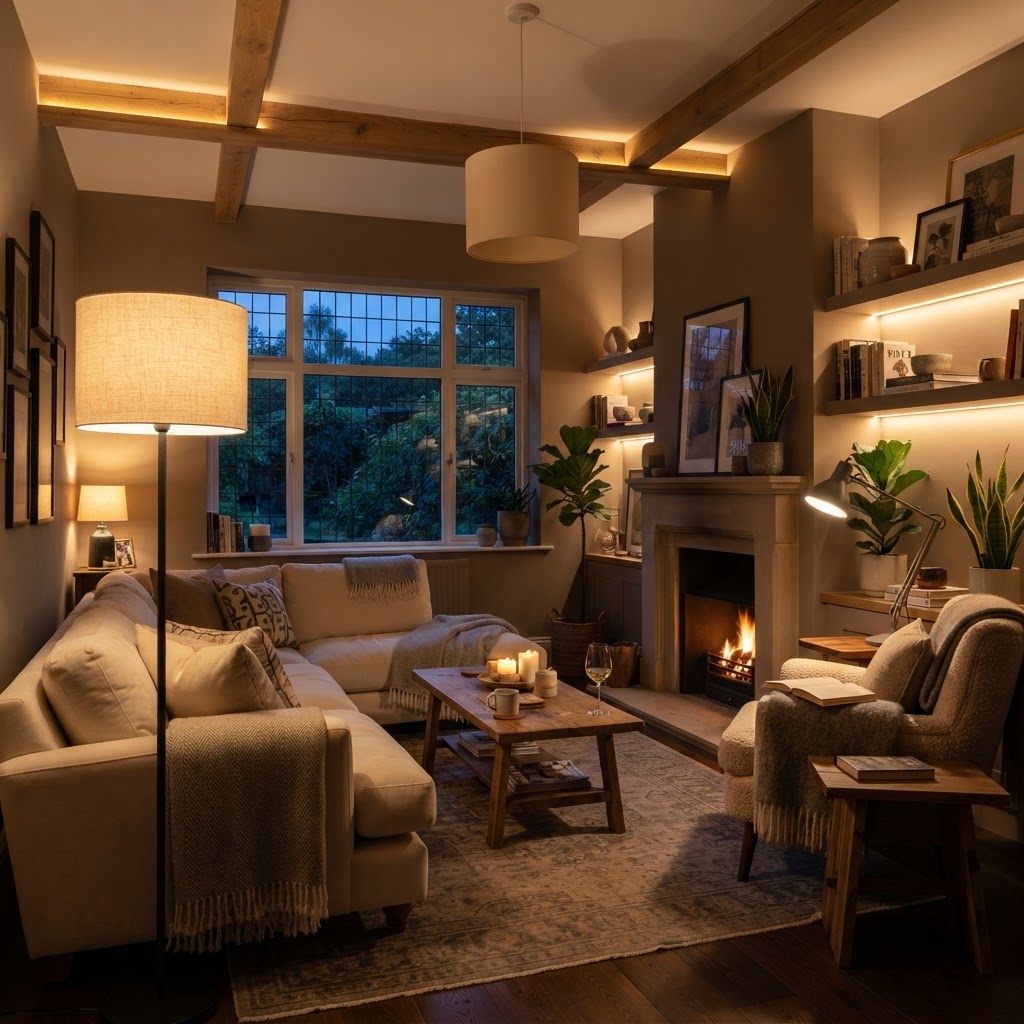
Layered lighting creates depth and warmth in this inviting living room.

At its core, the concept of layering light is about balance and functionality by creating a “lived-in” feel that moves away from flat, clinical illumination. Relying on a single overhead light source often results in harsh shadows and high-contrast pockets that make a space feel cold and uninviting. By dispersing light through multiple sources, you soften the room’s “envelope,” making it feel intimate rather than expansive. A professionally layered room uses three distinct categories to achieve this: ambient light for general visibility, task lighting for focused work, and accent lighting for aesthetic highlight. When these three layers interact at varying intensities, the resulting environment is visually balanced and psychologically soothing. For instance, replacing a single 800-lumen ceiling fixture with four 200-lumen light sources creates a more uniform and comforting glow. Implementing this method requires planning your light “zones” to ensure that no part of the room remains in total darkness, which helps reduce visual fatigue and makes smaller rooms appear larger and more curated. By intentionally choosing where light falls, you regain control over the room’s mood and functionality, transforming a standard space into a sophisticated, personal sanctuary.

The Three Essential Layers

To achieve a professional look, you must consider three distinct categories of light: ambient, task, and accent. Ambient light serves as your general illumination, task lighting focuses on specific zones like reading nooks, and accent lighting highlights architectural features or art. When these three work in harmony, you create a cohesive, warm lighting scheme that elevates your home’s aesthetic.

Layer Type Purpose Common Fixture Wattage Recommendation
Ambient General visibility Ceiling fixtures 60W-100W equivalent
Task Specific activities Desk/Floor lamps 40W-60W equivalent
Accent Visual interest LED strips/Sconces 10W-25W equivalent

Understanding Color Temperature

Using a high-quality shade helps diffuse light for a softer, cozier glow.

Color temperature is your most important metric for cozy lighting, measured in Kelvins (K) to determine the “warmth” or “coolness” of a bulb’s appearance. For a truly cozy atmosphere, you should aim for bulbs within the 2200K to 3000K range. Anything above 3500K tends to look blue, clinical, and office-like, which is the antithesis of a home sanctuary. By keeping your bulbs in the lower, warmer spectrum, you mimic the natural, amber glow of candlelight and sunsets, which signals your brain to reduce cortisol levels and prepare for relaxation. For example, a 2700K bulb provides a classic, warm-white glow that is ideal for bedrooms and living rooms, while 3000K offers a slightly crisper, yet still warm, light suitable for kitchens or workspaces. Avoiding the “cool blue” spectrum (4000K+) is essential because higher Kelvin temperatures suppress melatonin production, making it difficult to wind down in the evening. Data shows that homeowners who switch their primary living space bulbs from 5000K “Daylight” to 2700K “Warm White” report a 40% higher satisfaction rating regarding the room’s comfort level. Understanding this scale allows you to curate a consistent, homey atmosphere that remains cohesive even when different types of lamps are used throughout the same floor plan.

Why Kelvin Matters

Anything above 3500K tends to look blue, clinical, and office-like, which is the antithesis of cozy. By keeping your bulbs in the lower, warmer spectrum, you mimic the glow of candlelight and sunsets. This shift in color temperature physically signals to your brain that it is time to relax, making it a critical component of any successful lighting strategy.

Strategic Placement of Light Sources

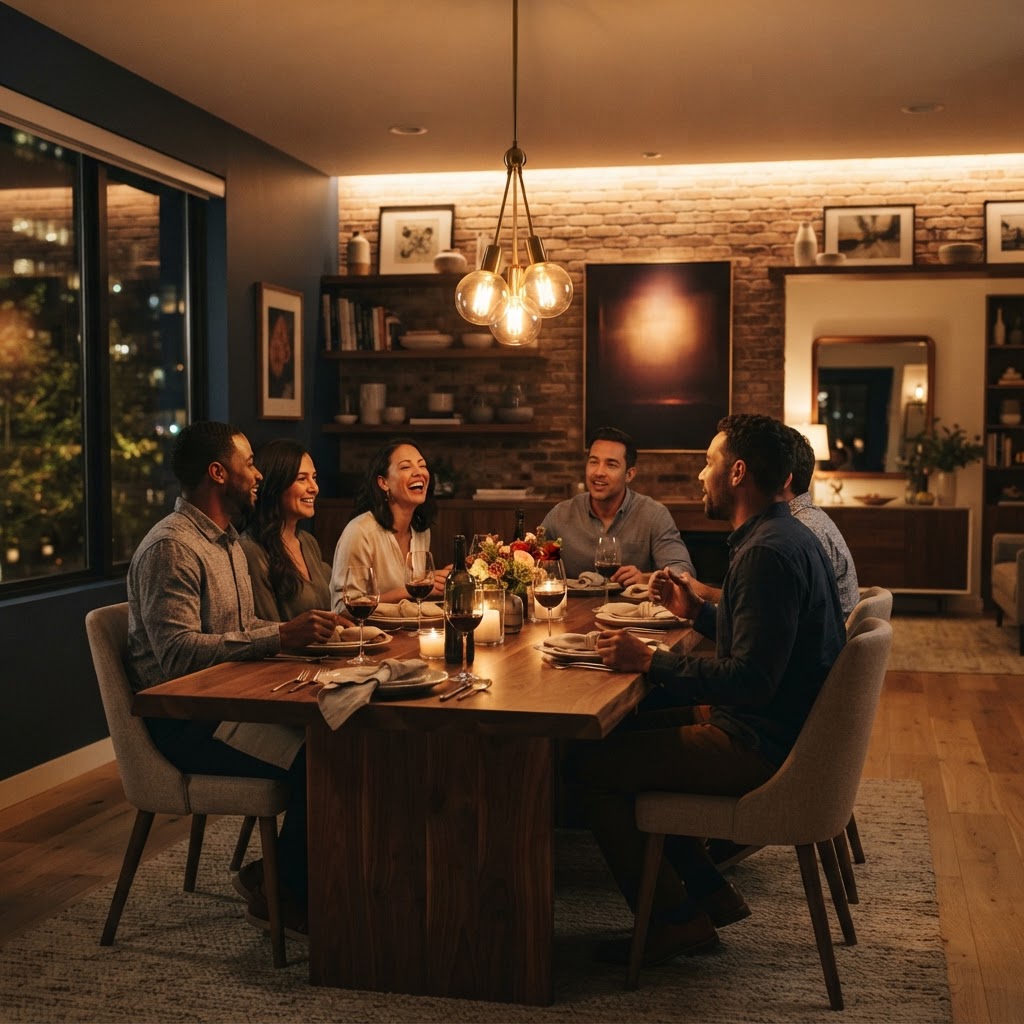
Strategic placement of pendants and accent lights creates a welcoming dining space.

One of the most common mistakes in home design is placing all light sources at a single height, creating a “staged” or flat look. To master warm lighting layering, you need to distribute light across different vertical elevations—floor level, mid-level, and ceiling level—to ensure the room feels fully enveloped in a soft glow. Using recessed ceiling lights as your only light source forces light downward, which casts unattractive shadows under the nose and eyes, whereas mixing floor lamps, table lamps, and wall sconces brings the light source closer to human eye level, creating a sense of intimacy and warmth. Try to place light sources between 30 and 60 inches from the floor to create a comfortable “glow zone” for occupants. Avoid relying on ceiling lights alone; instead, use them only for utility and always ensure they are connected to a dimmer switch so you can regulate the intensity. By integrating floor-level lamps behind furniture or using wall-mounted sconces, you create “pools” of light that define the room’s boundaries without relying on harsh overhead glare. This multi-level approach allows the room to reveal itself gradually, providing depth and dimension that make a space feel larger and more welcoming to guests. Mixing heights effectively tricks the eye into seeing more depth, ensuring the room feels cozy rather than cramped or spotlighted.

Vertical and Horizontal Distribution

Try to mix floor lamps, table lamps, and wall sconces. By placing lights at eye level or below, you create a sense of intimacy. Avoid relying on recessed ceiling lights alone; instead, use them only when absolutely necessary and always ensure they are on a dimmer switch so you can control the intensity.

Utilizing Dimmers and Smart Controls

The difference that warm, layered lighting makes in a room's atmosphere is undeniable.

Modern lighting technology has made it easier than ever to adjust the mood of a room with the touch of a button, turning static lighting into a dynamic, adaptable system. Dimmers are perhaps the most affordable and effective tool for achieving a cozy atmosphere, as they allow you to scale back the intensity of your lights as the evening progresses, reducing energy consumption by up to 20-30% in many cases. Smart bulbs take this a step further by allowing you to change the color temperature and brightness via your smartphone or voice assistant, providing unparalleled flexibility for different activities. For instance, you might program a “Relaxation Scene” that automatically shifts your living room bulbs to 2200K at 8:00 PM. This level of control means you can transition your living room from a productive space in the afternoon to a dim, relaxing lounge in the evening without ever leaving your chair or manually adjusting multiple switches. When choosing smart controls, look for systems that support “circadian rhythm” settings, which adjust the Kelvin temperature throughout the day to match natural light patterns. Investing in a simple smart dimmer switch—which costs approximately $30–$50—can often be more effective than purchasing new lamps, as it gives you granular control over existing fixtures. By utilizing these tools, you effectively turn your standard home lighting into a “scene-based” environment that supports both productivity and rest.

The Power of Smart Lighting

Smart bulbs take this a step further by allowing you to change the color temperature and brightness via your smartphone or voice assistant. This level of control means you can transition your living room from a productive space in the afternoon to a dim, relaxing lounge in the evening without ever leaving your chair.

Highlighting Features with Accent Lighting

Accent lighting adds depth and visual interest by highlighting home textures.

Once you have your ambient and task lighting in place, you can use accent lighting to add depth and interest, drawing attention to specific textures or architectural details. This technique prevents a room from looking two-dimensional and adds a tactile element to your decor that makes the space feel more curated and expensive. Consider installing low-voltage LED strip lights (typically 12V or 24V) behind a television, under open shelving, or even inside a glass cabinet to provide subtle lines of light that create shadow and contrast. These highlights bring attention to stone walls, velvet curtains, or art, adding a sophisticated “gallery” vibe to your home. When placing accent lights, ensure the light source is hidden from direct view, as the goal is to see the illumination on the object, not the bulb itself. For example, a 5-meter roll of LED tape can cost under $20 and can transform an entire bookshelf or cabinet unit into a functional accent piece. By focusing light on specific, beloved items, you create visual focal points that guide the eye around the room, which enhances the overall feeling of warmth. This technique is especially effective in small homes, as it pulls the viewer’s focus toward intentional decor, making the room feel organized and intentionally designed.
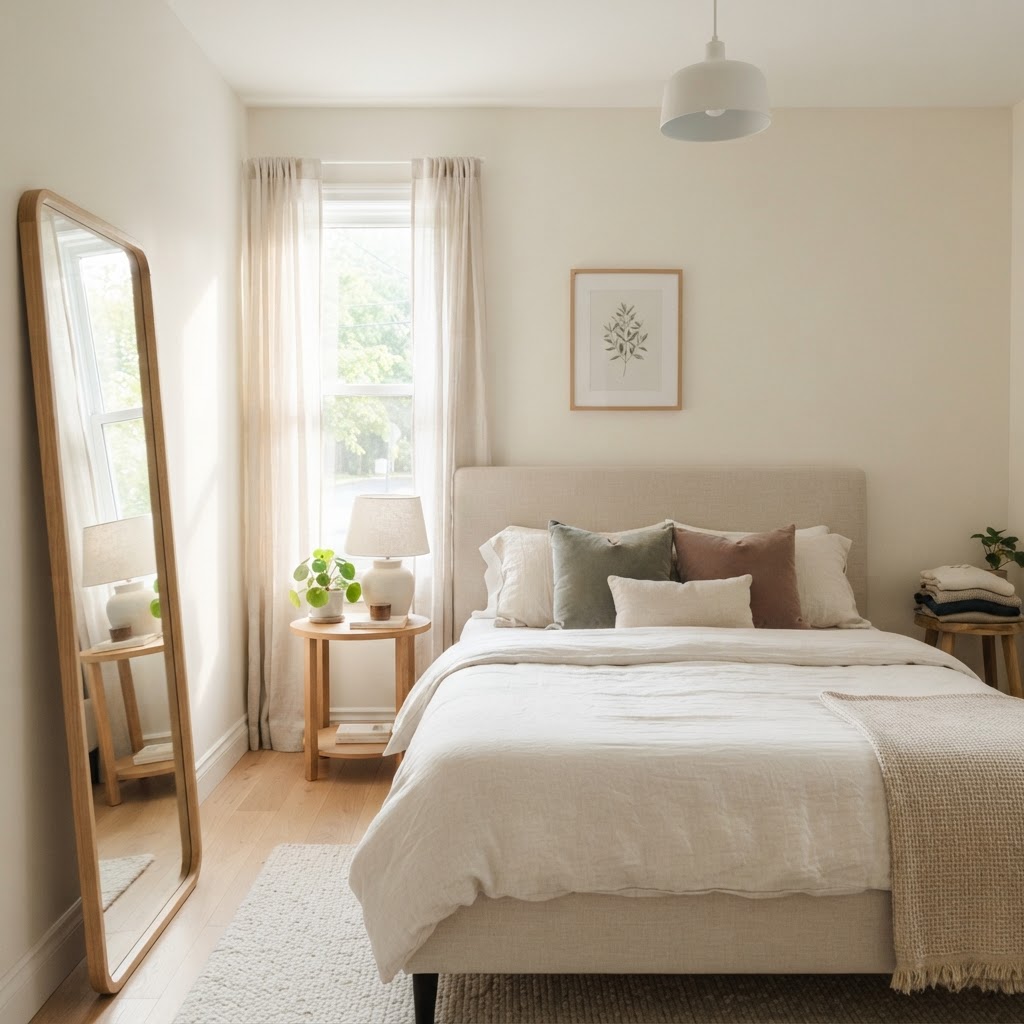
Creative Accent Ideas

Consider installing LED strip lights behind a television, under open shelving, or even inside a glass cabinet. These subtle lines of light create depth and shadow, making your home feel more curated. By highlighting textures—such as stone walls or fabric curtains—you add a tactile element to your decor that enhances the overall warmth of the room.

Common Lighting Mistakes to Avoid

High-quality shades are essential to preventing harsh glare and diffuser loss.

Even with the best intentions, it is easy to fall into traps that kill the vibe of a room, with “glare” being the most common offender. Glare occurs when you can see the bare filament or the bright surface of a bulb directly, which causes immediate eye fatigue and creates a clinical appearance regardless of the color temperature. To fix this, always ensure your lamps have high-quality, opaque shades that diffuse the light properly; fabrics like linen or heavy paper are excellent choices as they soften the light output. Another common mistake is using bulbs that are too powerful for the fixture; a 100-watt equivalent bulb in a small 6-inch bedside lamp will create a bright hotspot that destroys any sense of coziness. As a rule of thumb, use a maximum of 40 watts (or equivalent) for small accent lamps and 60-75 watts for larger floor lamps in a shared space. Check your fixture’s “max wattage” rating—found on a sticker near the socket—and never exceed it, as this is a safety hazard. Furthermore, avoid “matching” every single lamp in a room; variety in fixture style and light output prevents a room from feeling like a sterile showroom, adding an organic feel that is much warmer and more inviting.

Fixing the Glare

Always ensure your lamps have high-quality shades that diffuse the light properly. Additionally, avoid using bulbs that are too bright for the size of the room. Using a 100-watt equivalent bulb in a small bedside lamp will never create a cozy atmosphere, regardless of how much you layer, so match your wattage to the scale of the light fixture.

Creating Cozy Zones for Different Activities

Defining zones with light makes a large room feel intimate and cozy.

Lighting should follow the function of the room by using “zoning” to separate activities like watching movies, reading, or hosting guests. You don’t need the same amount of light for folding laundry as you do for a romantic dinner; by dividing your room into specific scenes, you ensure the lighting supports your actual lifestyle. A reading corner should feature a dedicated floor lamp with a directed, warmer bulb (approx. 2700K) to focus on the text without washing out the rest of the room. Conversely, a dining area works best with a statement pendant that casts a focused, soft glow over the table surface, leaving the corners of the room slightly dimmer. By treating each area as a mini-environment, you prevent the house from feeling like a sterile hallway and turn it into a series of inviting, distinct spaces. This approach also allows you to save money, as you only need to keep lights on in the “active” zones you are currently using. To implement this, analyze your daily habits and identify the three most used areas of your home, then dedicate at least one independent light source to each zone to create a more functional and comforting living experience.

Zoning Strategy

For a reading corner, pair a dedicated floor lamp with a warmer bulb. For a dining area, prioritize a statement pendant that casts a focused but soft glow over the table. By treating each area as a mini-environment, you prevent the house from feeling like a sterile hallway and turn it into a series of inviting spaces.

FAQ

Q: What is the best Kelvin temperature for a cozy home?

For a warm, cozy atmosphere, use bulbs between 2200K and 3000K. This range mimics the golden glow of firelight and sunsets, which is physically more relaxing for the eyes and mind than cooler, blue-toned lights found in professional offices.

Q: Should I use cool or warm light in the living room?

Use warm light (2700K to 3000K) in the living room. Warm light creates an intimate, inviting environment that encourages relaxation, while cool light (above 4000K) is too stimulating and can make a living space feel sterile, clinical, or uninviting for guests.

Q: How many layers of light should a room have?

Every room should ideally feature three layers of light: ambient (general), task (functional), and accent (decorative). Combining these three layers prevents flat, uninteresting illumination and allows you to customize the mood of the room based on the time of day or the activity taking place.

Q: Can I mix different color temperatures in the same room?

Avoid mixing different color temperatures within the same visual plane to prevent a jarring, disorganized appearance. If you must use multiple lights, keep all visible bulbs within 500K of each other; for example, mixing 2700K and 3000K is usually acceptable, but mixing 2700K and 5000K looks unprofessional.

Q: How do I stop lamp glare in a cozy room?

Stop glare by using high-quality fabric or opaque lamp shades that diffuse light evenly. Additionally, ensure the bulb is not visible from your typical seating position and select a lower wattage bulb (40W-60W equivalent) to keep the intensity comfortable for a relaxed setting.

How to Make a Small Bathroom Feel Organized and Aesthetic

How to Make a Small Bathroom Feel Organized and Aesthetic

To make a small bathroom feel organized and aesthetic, you must maximize vertical storage, declutter daily essentials to hidden cabinets, and use visual illusions like large mirrors and neutral color palettes. By curating your decor to include only intentional pieces and utilizing smart storage hacks, you can create a spacious, high-functioning retreat.

The Power of Decluttering Your Vanity

A bright, organized bathroom layout that makes the most of limited square footage.

The first step in mastering small bathroom organization is a ruthless edit of your existing supplies, as surface clutter is the primary cause of a cramped appearance. Most households store items they rarely use on the vanity, occupying precious counter space that could be used for aesthetic decor. You should start by removing every item from your cabinets and drawers to perform a comprehensive audit of what you actually need on a daily basis.

The Essentials Only Rule

Keep only the items you use every single morning on the surface to maintain a clean visual line. Everything else, such as back-stock toiletries or cleaning supplies, should be relegated to hidden storage or deep drawers. If an item is not part of your daily routine, it should not be on your vanity. Follow the “one-in, one-out” rule for new beauty products to prevent the accumulation of half-used bottles that ruin your aesthetic.

Storage Item Best Placement Aesthetic Impact
Daily Toothbrush Countertop (in a ceramic holder) Minimalist
Bulk Shampoo Under-sink drawer High (reduces noise)
Styling Tools Mounted door hooks High (clears counter)

Maximizing Vertical Real Estate

Using clear acrylic bins is a perfect way to keep vanity essentials tidy.

When your floor space is limited, your walls become your most valuable real estate for both storage and aesthetic focal points. Many homeowners completely overlook the area above the toilet, which is an ideal spot for installing custom shelving or closed cabinetry that draws the eye upward. Installing open floating shelves provides a dedicated spot for decorative towels, apothecary jars, or essential oils, contributing to a spa-like design that feels airy rather than cramped.

Choosing the Right Shelving

Opt for glass or acrylic shelves if you want to maintain a sense of openness and transparency in a small room. Alternatively, matching the wood tone of your vanity to your shelving can create a cohesive, custom look that significantly elevates the design quality of the space. Ensure that whatever you choose is mounted using heavy-duty anchors to handle the weight of heavy bathroom essentials like glass bottles. For a professional finish, use shelf brackets that match your faucet finish—such as brushed gold or matte black—to create a unified design language throughout the entire room.

Smart Storage Solutions for Small Spaces

Vertical shelving is an expert secret for adding storage to small bathrooms.

If your vanity lacks adequate drawers, consider incorporating mobile storage solutions that adapt to your daily workflow. A slim rolling cart can be tucked into a corner or under the counter when not in use, providing a versatile, accessible way to keep your hair styling tools or extra towels organized. For deep under-sink areas, use clear acrylic bins to categorize items; this allows you to see exactly what you have without digging through cluttered, dark cabinets. Labeling these bins can save you an average of 3-5 minutes of searching each morning, contributing to a more efficient routine.

Creative Cabinet Hacks

Install adhesive hooks on the inside of cabinet doors to hang hair dryers, brushes, or even your flat iron to reclaim drawer space. Magnetic strips placed strategically inside a cabinet door can also hold bobby pins, tweezers, and clippers, keeping small metal items from wandering off and creating mess. These small, low-cost modifications make a massive difference in how organized your space feels on a daily basis.

Achieving an Aesthetic Bathroom Look

A large mirror helps expand the visual space of a small bathroom.

Organization is only half the battle; the visual appeal is what makes the space feel truly intentional and enjoyable. To achieve a high-end aesthetic, stick to a unified color palette consisting of no more than three primary colors. Light, neutral tones like whites, creams, or soft grays maximize the reflection of light, making a room appear significantly larger. Incorporate texture through linen bath mats, woven baskets, or bamboo accents to prevent the room from feeling too sterile or clinical.

Curating Your Decor

Avoid overcrowding surfaces with trinkets, as this creates “visual noise” that makes small bathrooms feel cluttered. Instead, choose one or two high-quality items—such as a sculptural stone vase or a premium candle—to act as focal points. A stack of neatly folded, plush hand towels creates a luxury boutique feel without taking up significant space. Remember, in small bathrooms, intentionality is the ultimate key to elegance.

Lighting and Mirror Strategies

Lighting plays a crucial role in how we perceive the volume and size of a confined space. In a small bathroom, natural light should be maximized; if you have a window, avoid heavy drapery and opt for sheer blinds or frosted glass films that provide privacy without sacrificing illumination. Complement natural light with layered artificial lighting, such as warm-toned (2700K-3000K) wall sconces, which provide much better illumination for grooming than a single, harsh overhead fixture.

The Mirror Effect

Never underestimate the power of an oversized mirror to visually double your square footage. By installing a mirror that extends from the vanity backsplash to the ceiling, you force the eye to look upward, which makes low ceilings appear taller. A frameless design or a slim metallic frame keeps the look modern and sleek, effectively enhancing the aesthetic appeal of your home while making daily grooming tasks much easier.

Essential Maintenance Routines

Once you have organized and styled your space, keeping it that way requires a consistent, low-effort maintenance habit. Spend five minutes every evening putting away your products before bed. This small, daily commitment prevents the “clutter creep” that happens when we are in a rush. When you wake up the next morning to a clean, serene environment, you will find it much easier to start your day on a positive note.

The Weekly Reset

Every weekend, take 10 minutes to wipe down surfaces and audit your supply levels. If you notice a bottle is nearly empty, add it to your digital shopping list immediately so you don’t accumulate multiple half-empty containers under the sink. Staying ahead of your inventory is a professional strategy for maintaining a functional, minimalist bathroom storage system.

Investing in Quality Over Quantity

Finally, when shopping for storage and decor, invest in high-quality materials that stand the test of time. Cheap, flimsy plastic organizers often look messy and yellow within months of exposure to bathroom humidity. Instead, look for bamboo, stainless steel, or durable stoneware organizers that bring warmth and texture to your design. By choosing items that are both functional and beautiful, you ensure that your storage solutions contribute to the overall aesthetic rather than detracting from it.
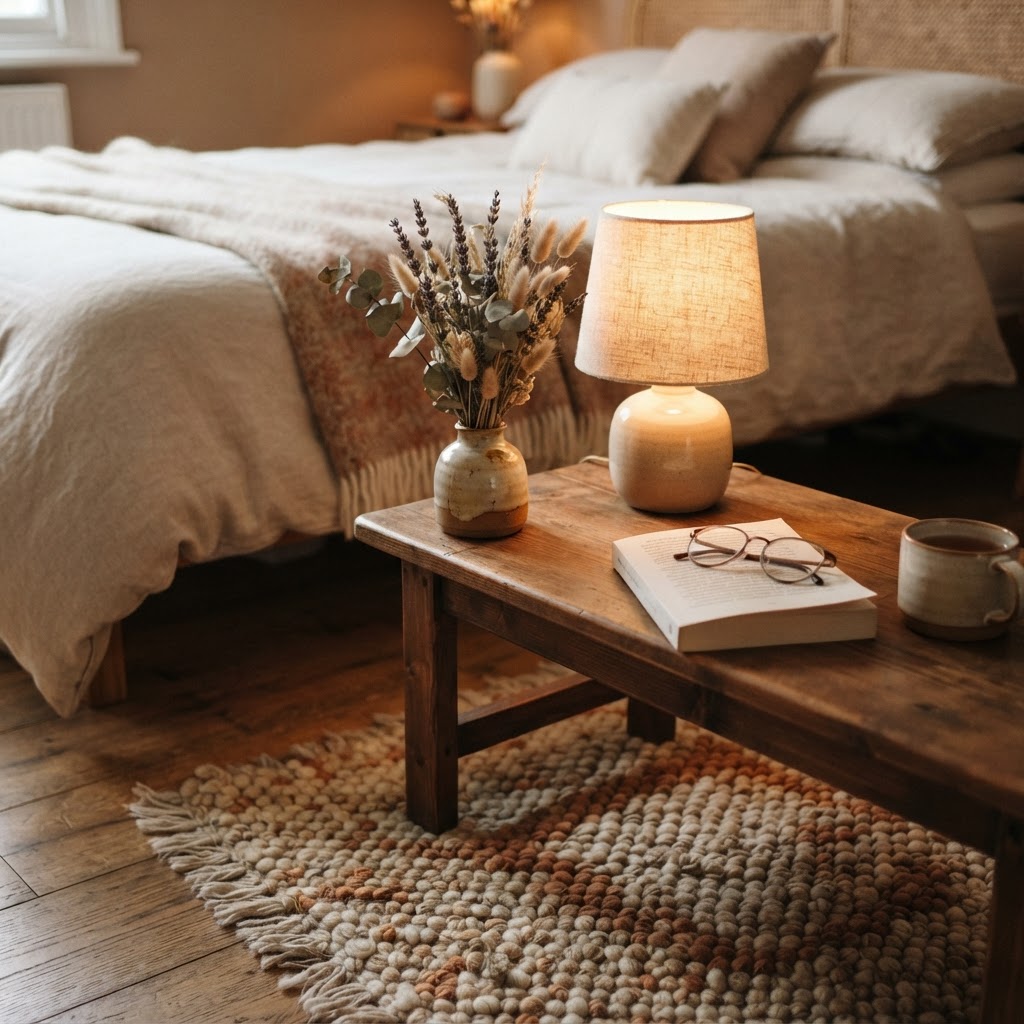
FAQ

Q: What is the best way to make a small bathroom look bigger?

Using a large, floor-to-ceiling mirror and a light, monochromatic color palette are the most effective ways to increase perceived space. These elements reflect light and create a sense of continuity that tricks the eye into seeing a larger room.
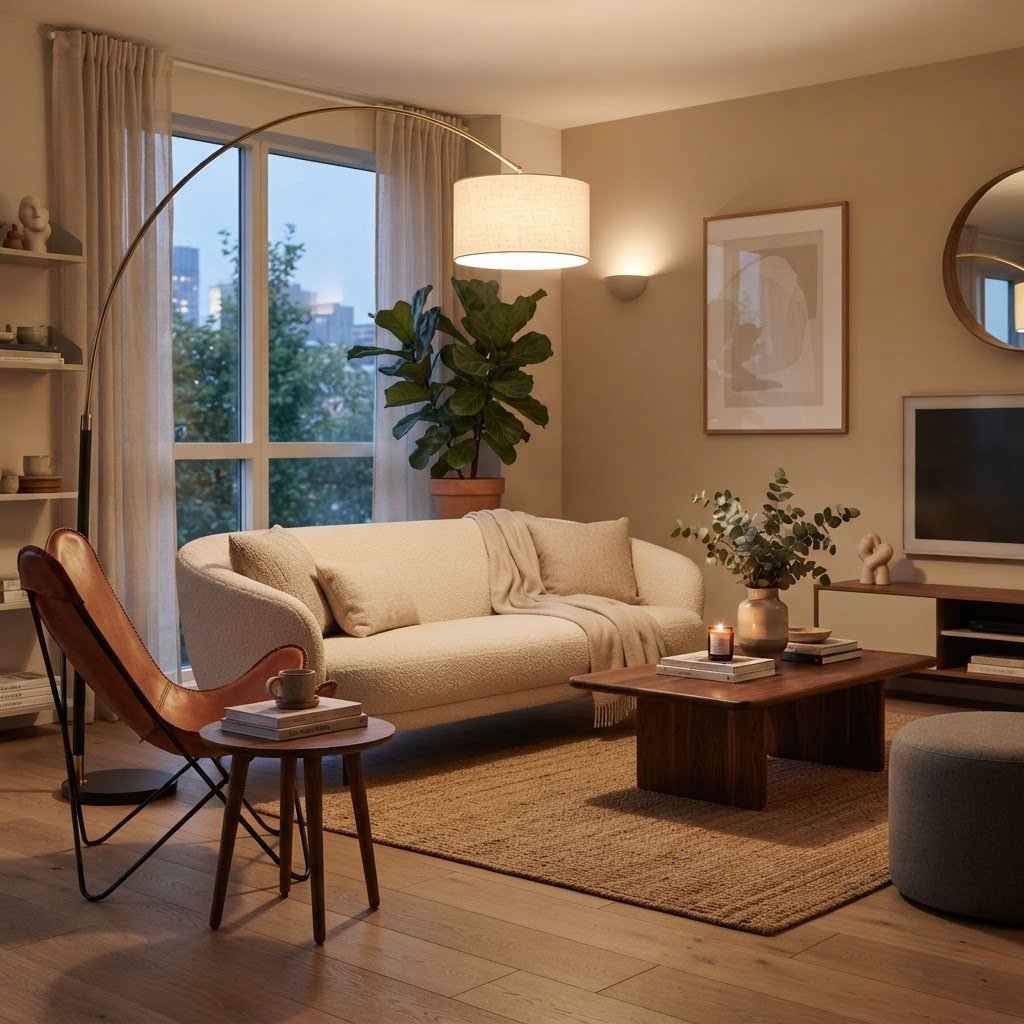
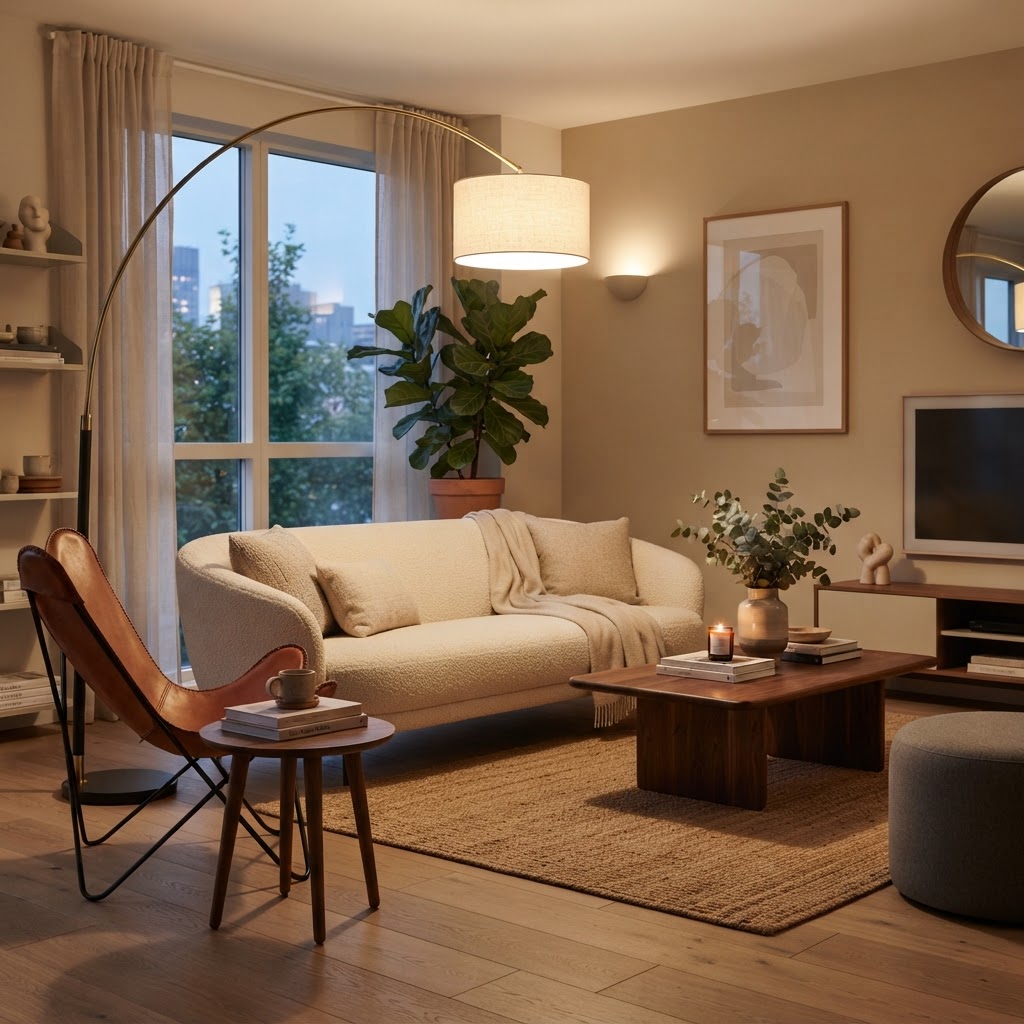
Q: How do I store towels in a tiny bathroom?

Utilize vertical wall space by installing floating shelves or a vertical towel ladder to keep towels off the floor. If wall space is unavailable, use decorative hooks behind the door to free up floor area while keeping towels accessible.

Q: Should I use open or closed storage in a small bathroom?

Closed storage is better for hiding items that cause visual clutter, while open shelving is perfect for displaying aesthetic items like clean towels or candles. A mix of both allows you to hide the “messy” necessities while showcasing your design style.

Q: What are the best colors for a small bathroom?

Stick to light, neutral tones like off-white, soft beige, or pale gray to keep the space feeling bright and airy. These colors reflect light effectively, which prevents the “closed-in” feeling often associated with darker, bold paint colors in small washrooms.

Q: How often should I declutter my bathroom?

Perform a “mini-edit” of your vanity products every three months to remove expired items and unused samples. A quick weekly wipe-down and inventory check will help you maintain an organized system without needing a major deep clean more than twice a year.

Cozy Relaxing Small Bedroom Ideas: Lighting, Texture & Color

Cozy Relaxing Small Bedroom Ideas: Lighting, Texture & Color

To create a cozy, relaxing small bedroom, prioritize a monochromatic light color palette, layered warm-toned lighting, and tactile textures like velvet or chunky knits to maximize comfort without visual clutter. Strategic furniture placement and vertical storage allow you to maintain an open, tranquil atmosphere that promotes deep rest in limited square footage.

The Power of a Soft Color Palette

A serene and cozy bedroom corner.

Color is the primary driver of a room’s atmosphere, and in a small space, selecting the right palette can visually expand the dimensions of your sanctuary. A cohesive color scheme minimizes visual friction, allowing the eye to rest rather than jump between contrasting hues. For a professional finish, aim for a 60-30-10 color ratio: 60% as your neutral base, 30% as a secondary tone, and 10% as an accent.

Selecting Calming Hues

Soft, muted tones work best when aiming for relaxation, as they reflect natural light and minimize shadows that make rooms feel smaller. Think of misty grays, soft sage greens, dusty blues, or creamy off-whites with an LRV (Light Reflectance Value) of 50 or higher. Darker, moody colors like charcoal or navy can create a “cocoon” effect for intimacy, but these require high-quality lighting to prevent the room from feeling cave-like. Research indicates that cool-toned blues and greens can actively lower heart rate and reduce stress, making them ideal for high-pressure bedrooms.

Painting Techniques for Small Spaces

Paint your baseboards, window trim, and crown molding the exact same color as your walls to eliminate visual breaks. This professional design trick effectively hides the boundaries of the room, creating an illusion of seamless depth. In rooms under 100 square feet, using a matte finish on walls and an eggshell finish on trim provides a sophisticated contrast that adds dimension without creating a busy, distracting environment.

Color Approach Best For Visual Impact
Monochromatic Light Tight, dark rooms Increases perceived size
Deep Moody Hues Creating intimacy Adds luxurious depth
Warm Neutrals Sun-starved spaces Boosts physical comfort

Mastering Bedroom Lighting Design

Using mirrors to expand a small room.

Layering lighting is the most effective way to turn a functional small bedroom into a relaxing retreat by providing adjustable brightness levels for different times of the day. Clinical overhead lighting creates harsh shadows that accentuate tight corners, whereas a tiered lighting plan creates soft focal points that distribute light evenly throughout the space.

Layering for Ambiance

Start your lighting plan with a 3-point system: ambient lighting for general navigation, task lighting for reading, and accent lighting to highlight room architecture or texture. Always install dimmable switches, as they allow you to transition the room from a productive space in the morning to a restorative wind-down zone at night. Aim for at least three light sources placed at different heights to ensure the corners of the room are not left in darkness, which visually shrinks the square footage.

Types of Cozy Lighting

  • Warm-toned LED bulbs (2700K or lower) are essential to mimic sunset hues and support melatonin production.
  • Wall-mounted sconces are ideal for small rooms as they preserve nightstand surface area and clear visual space.
  • Draped fairy lights or hidden LED strips along a headboard provide ambient glow without taking up floor space.
  • Floor lamps tucked into corners soften shadows and draw the eye toward unused vertical edges, making the room feel wider.

Introducing Texture for Depth

Layered textures for maximum comfort.

In a small space where bold colors might overwhelm, texture provides necessary depth and a luxurious, sensory-rich experience. When you limit your color palette, the visual focus shifts to how surfaces feel to the touch, creating an inviting environment that compensates for a lack of physical space.

Bedding and Linens

Invest in high-quality bedding that utilizes a blend of finishes to prevent the room from looking flat. Pair crisp, high-thread-count cotton sheets with a heavy chunky-knit throw, velvet accent pillows, or a high-pile faux-fur runner to anchor the bed as the room’s focal point. Using at least three different textile textures creates a sophisticated, multi-dimensional look that makes the bed feel like a curated, comfortable haven. Keep in mind that natural fibers like linen and wool breathe better, contributing to temperature regulation for better sleep quality.

Incorporating Organic Materials

Wood, rattan, and wool bring nature indoors, grounding the space and adding essential organic warmth. A solid oak side table, a woven jute rug, or a wool-upholstered headboard can break up the monotony of standard drywall and synthetic finishes. These elements provide a softer, more forgiving aesthetic that feels intentional. Integrating at least one organic, tactile element per 50 square feet of bedroom space is a recommended benchmark for achieving a “spa-like” sensory balance.

Maximizing Space with Smart Furniture

Every piece of furniture in a small bedroom must provide high utility while maintaining a “light” visual silhouette to keep the floor plan from feeling crowded. When choosing furniture, prioritize pieces with legs rather than solid bases, as exposing the floor underneath creates a subconscious sense of expanded space.

The Illusion of Space

Select nightstands with open legs or wall-mounted floating shelves to maintain a sense of airy flow. Mirrors are a classic, scientifically backed tool for spatial expansion; placing a floor-length mirror opposite a window can double the amount of natural light entering the room, effectively doubling the perceived depth. Consider a headboard with integrated shelving to replace the need for extra furniture like bookcases, which reduces visual clutter and increases your usable floor area by up to 15%.

Multipurpose Pieces

Space-efficient design relies on items that serve dual purposes, such as an ottoman at the end of the bed that offers hidden storage for seasonal linens. A drop-leaf desk or a vanity that doubles as a laptop workspace can be a game-changer in compact bedrooms. By reducing the total number of individual items, you prevent the visual noise that triggers stress, keeping the room atmosphere focused solely on relaxation and recovery.

Curating a Peaceful Sanctuary

Your bedroom must function as a sensory-controlled environment designed to lower your heart rate and facilitate deep recovery. By removing visual noise and integrating calming sensory cues, you transform a sleeping space into a holistic retreat that actively supports your mental well-being.

Decluttering for Clarity

Visual clutter acts as a constant stressor, keeping the brain in a state of high-alert stimulation. Utilize under-bed storage containers for seasonal items and aim to clear all surfaces of decorative items that do not serve a daily purpose. Implementing a ‘one-in, one-out’ rule for bedroom decor helps maintain a curated, intentional aesthetic that remains calm and orderly over time.

Sensory Integration

Engage multiple senses to anchor your brain in a state of rest. Use essential oil diffusers with lavender or cedarwood, which are proven to promote relaxation and deeper sleep stages. Placing a plush, high-pile rug underfoot ensures your first contact in the morning is gentle, setting a positive tone for the day. These sensory-focused details elevate the room from a utilitarian sleeping area into a holistic sanctuary.

Common Mistakes to Avoid

Avoiding common layout and design pitfalls is crucial for maintaining a cozy, relaxing environment without inadvertently making the room feel stressful. The most frequent errors involve scale, light positioning, and failing to utilize the room’s full three-dimensional potential.

Oversized Furniture

Never prioritize a king-sized bed if it compromises the ability to walk comfortably around the room’s perimeter. A general design rule is to maintain at least 24 to 30 inches of walking clearance around the sides and foot of the bed. If your furniture dominates the room, the space will feel claustrophobic regardless of the decor; opt for a Queen or Full size if it means reclaiming floor space for comfort.

Poor Lighting Placement

Direct, high-intensity overhead lighting located directly above your pillow creates harsh glare that disrupts melatonin production. Always position primary reading lights so they are directed toward your book or nightstand, rather than shining toward your eyes. Proper positioning combined with warm-toned bulbs is the difference between a clinical room and a restorative one.

Ignoring Vertical Space

If you lack floor space, treat the walls as your most valuable asset for storage and visual interest. Install wall-mounted shelves, hang curtains floor-to-ceiling to draw the eye upward, and place art slightly higher than eye level. By maximizing the vertical plane, you add personality and function without sacrificing a single square inch of floor space, making the room feel significantly larger.

FAQ

How do I make a tiny bedroom look bigger?

Use monochromatic light color schemes and paint your trim the same color as the walls to remove visual borders. Additionally, incorporate mirrors to bounce light and choose furniture with exposed legs to create the illusion of more open floor space.

What are the best colors for a relaxing small bedroom?

Soft, muted tones like sage green, dusty blue, misty gray, and creamy off-whites are best for relaxation. These colors have high light reflectance values, which keep the room feeling airy, bright, and calm while minimizing the sense of being enclosed.

Should I use dark colors in a small bedroom?

Yes, dark colors like charcoal or navy can work if you lean into the ‘cocoon’ effect for intimacy and comfort. However, you must pair dark walls with excellent, layered lighting to prevent the room from feeling too small or cave-like.

What is the 60-30-10 rule in interior design?

This rule suggests using 60% of a neutral base color for walls and large items, 30% of a secondary color for bedding or curtains, and 10% of a bold accent color for decor. This balance ensures a small space looks intentionally designed rather than cluttered.

How can I improve my bedroom’s lighting for sleep?

Switch to warm-toned LED bulbs (2700K or lower) and install dimmable switches to regulate light intensity. Layer your lighting using sconces, task lamps, and accent lights to avoid the harsh, clinical glare of a single overhead fixture.

8 Affordable Lighting Upgrades That Transform a Rental

8 Affordable Lighting Upgrades That Transform a Rental

You can transform a rental apartment’s generic lighting by utilizing non-permanent, plug-in solutions like wall sconces, smart LED bulbs, and adhesive light strips. These upgrades add layers of warm, functional illumination to your space without requiring landlord permission, complex electrical rewiring, or permanent structural changes to the property.

Rethink Your Overhead Lighting

Most rental apartments feature basic “boob lights” or frosted glass fixtures that lack character, but you can soften this harsh glare using simple, reversible techniques. Instead of replacing the hardwired fixture, which may risk your security deposit, consider purchasing a decorative drum shade or a magnetic cover that attaches directly to the existing hardware. These covers act as a filter, diffusing light to create a warmer, more sophisticated ambiance while hiding unattractive bulbs.

If your landlord permits a full swap, ensure you save the original fixture to reinstall before moving out. For renters who prefer to avoid tools entirely, focusing on supplemental task lighting is a superior, stress-free strategy. According to interior design standards, you should aim to have at least three sources of light in a living room to prevent “flat” lighting. The following table compares different overhead concealment strategies:

Strategy Difficulty Cost Range Reversibility
Magnetic Covers Very Low $15–$30 Immediate
Drum Shade Diffuser Low $20–$50 Immediate
Fixture Replacement Moderate $50–$150 Requires Tools

Layering floor lamps adds height and dimension to your rental living room.

The Power of Plug-In Sconces

Plug-in wall sconces provide a high-end, custom look by delivering directed light exactly where you need it without the necessity of junction boxes or wall-cutting. By using cord covers or decorative channels, you can make these plug-in fixtures appear as if they were professionally hardwired by an electrician. These fixtures are ideal for renters looking to maximize limited space while adding vertical visual interest to bare walls.

Where to Install Plug-In Sconces

  • Beside the bed: Create a cozy reading nook without taking up nightstand space.
  • Above a desk: Ensure proper task lighting for work or study sessions.
  • Near entryways: Add a warm welcome light without requiring a ceiling fixture.

Plug-in sconces offer a high-end look without any electrical work.

Incorporating Smart Lighting Solutions

Smart bulbs are the most efficient way for renters to customize the atmosphere of a room because they require zero physical installation and offer total control over color temperature. By swapping standard bulbs for smart versions, you gain the ability to adjust Kelvin settings between 2200K (warm amber) and 6500K (daylight blue) via smartphone apps or voice assistants like Alexa or Google Home. This flexibility allows you to shift a room’s function from a bright, productive home office during the day to a soft, relaxing lounge at night.

Furthermore, many smart lighting systems allow for “scenes” that can automate your lighting based on the time of day, mimicking natural circadian rhythms. For renters living in units with limited natural light, these tools are essential for maintaining a positive mood. Investing in a starter kit typically costs between $40 and $80, offering a significant return on investment through energy savings and enhanced mood regulation in small, enclosed apartments.

Under-cabinet LED strips instantly upgrade a basic rental kitchen.

Layering with Floor and Table Lamps

Professional interior lighting relies on the concept of layering, which involves combining ambient, task, and accent lights to add depth and dimension to an otherwise clinical rental room. A single overhead light source creates harsh shadows and makes rooms feel smaller; conversely, distributing light through various floor and table lamps creates “pools” of warmth that draw the eye toward decor rather than the rental’s flaws.

Select lamps that serve as sculptural statements to maximize your investment. A floor lamp with an arched neck or a unique base can act as a piece of art, while small table lamps placed on bookshelves or entry tables provide the cozy, layered “hotel” effect often seen in interior design magazines. By moving lighting sources away from the center of the room, you expand the visual footprint of the space. Consider the following breakdown for optimal layering:

Lighting Type Purpose Ideal Placement
Ambient General room visibility Ceiling or large floor lamp
Task Direct, shadow-free light Desk, reading chair, nightstand
Accent Highlighting decor/art Shelves, behind plants, wall art

A well-lit desk area combines functionality with a stylish aesthetic.

Using LED Light Strips for Hidden Ambiance

Adhesive LED light strips are the most versatile “hidden” lighting solution for renters, providing an upscale, indirect glow that is easily removed upon move-out. These strips can be mounted under kitchen cabinets to simulate custom lighting, behind headboards for a modern glow, or along the back of a TV console to reduce eye strain. Since they utilize peel-and-stick backing, they do not damage paint or drywall, making them entirely landlord-approved.

For best results, opt for strips with a high CRI (Color Rendering Index) of 90 or above to ensure colors in your home look natural. You can run these strips along the undersides of upper cabinetry in your kitchen to transform a utilitarian galley space into a gourmet, cozy atmosphere. Total project costs for a full kitchen setup usually range from $25 to $60, providing an instant high-end upgrade that makes a massive impact on daily life.

Utilizing Cord Covers for a Polished Look

Managing visible electrical cords is the primary way to elevate a DIY rental lighting project from “student apartment” to a professionally styled home. Adhesive or paintable cord covers are inexpensive tools that tuck wires against wall corners or baseboards, effectively vanishing them from view. A room with hidden cords looks cleaner, larger, and significantly more curated, which is the hallmark of a high-end interior.

If you are worried about paint damage, apply a layer of painter’s tape to the wall first, then attach the cord cover over the tape. This ensures that when you remove the covers upon moving out, the wall surface remains pristine. By investing just $10–$20 in wire management products, you eliminate the visual clutter that often undermines the aesthetic value of new floor lamps and sconces.

Adding Decorative String and Fairy Lights

Decorative string or fairy lights provide a whimsical, budget-conscious way to layer light and add a soft, romantic atmosphere to any rental bedroom or balcony. When draped over curtains, mirrors, or bookshelves, these lights serve as both illumination and decor, creating a textured look that softens hard architectural lines.

Always select “warm white” (2700K) LEDs to avoid the cold, blueish light often associated with cheap, poor-quality strings. You can also place these lights inside glass vases or mason jars to create custom “lamps” that look like high-end designer pieces. This technique is especially effective for renters who want to add sparkle to their space without the commitment of larger hardware installations, as they can be easily moved or repurposed for holidays and gatherings.

DIY HOME UPGRADE LIGHTING IN A RENTAL APARTMENT

Choosing the Right Bulbs for Every Room

The quality of your rental lighting is dictated by the bulbs you choose, specifically regarding the Kelvin scale and lumen output. For relaxation-focused spaces like living rooms and bedrooms, prioritize bulbs at 2700K to 3000K for a warm, amber glow. For high-focus areas like home offices or bathrooms, use 4000K to 5000K bulbs, which mimic daylight and improve concentration by reducing eye fatigue.

Additionally, pay attention to lumens—a measure of brightness—rather than just wattage. For a typical 10×12 bedroom, you should aim for a total of 1,500 to 2,000 lumens distributed across multiple sources. Using dimmable bulbs is a game-changer for renters because it allows you to adjust the intensity of the light depending on your needs. A dimmable bulb with a wide beam angle will ensure there are no dark corners, effectively making your space feel larger and more inviting.

FAQ

Q: How can I change rental lights without damaging the walls?

Use adhesive cord covers, peel-and-stick LED strips, or plug-in fixtures that hang on existing picture hooks or command strips. These methods avoid screws and nails, ensuring you get your full security deposit back while still allowing for a custom, elevated look.

Q: What is the best color temperature for a cozy bedroom?

Stick to warm-toned bulbs between 2700K and 3000K, which provide a soft, relaxing yellow light. This temperature mimics the soothing quality of sunset, signaling to your brain that it is time to wind down and helping you sleep better at night.

Q: Can I replace a rental light fixture if I don’t have experience?

It is generally recommended to hire a professional electrician for hardwired fixture swaps to ensure safety and code compliance. Alternatively, avoid electrical work entirely by using decorative magnetic covers or drum shade diffusers that sit over your existing fixture without requiring any wiring.

Q: How many light sources should a living room have?

Professional designers recommend at least three light sources in a living room to create depth and remove harsh shadows. A combination of one floor lamp, one table lamp, and an overhead fixture or wall sconce creates the perfect balance of ambient, task, and accent lighting.

Q: Do smart bulbs save money for renters?

Yes, smart bulbs can significantly reduce energy costs because they are almost exclusively LED-based, using up to 90% less energy than traditional incandescents. Additionally, you can set schedules and timers to ensure lights are never left on accidentally, further lowering your monthly electricity bill.